

Emotion-Evoking Interior Lighting
Lighting is a crucial part in creating a render’s overall look and feel. Creating the atmosphere you aim to convey, an artist must first visualize what they want to create and really understand it.

Have you ever watched a movie and thought about what it would feel like if you were in that very scene?
The atmosphere and mood of the room can both be expressed through the acting of the actors, or through the room setting itself. Well, in 3D rendering, lighting is one of our “actors” to express and show the experience to the viewers. Lighting is how we are portraying our scene for the captured emotion in the image.
Shaping Emotions Through Interior Lighting
The basics of lighting starts when we as artists learn about color. When the color blue meets the color red, it creates a fresh ambiance feel to it. Thus, it plays a crucial role for creating the overall look and feel of an image.
Before creating an interior lighting, there are a series of considerations we ought to go through. It all starts with determining our reference image, references are important to help us cut out the time we would waste excessively tweaking an image due to not having a plan in mind. It all starts with determining a reference image, from there we must not just see it, but we must feel the image. Visualize ourselves being in that image, feel, and analyze. The time of day, the sun position, the light’s tone, analyze what makes the reference image so good. Then other factors such as light placement, artificial and natural light balancing, and tone will follow along.
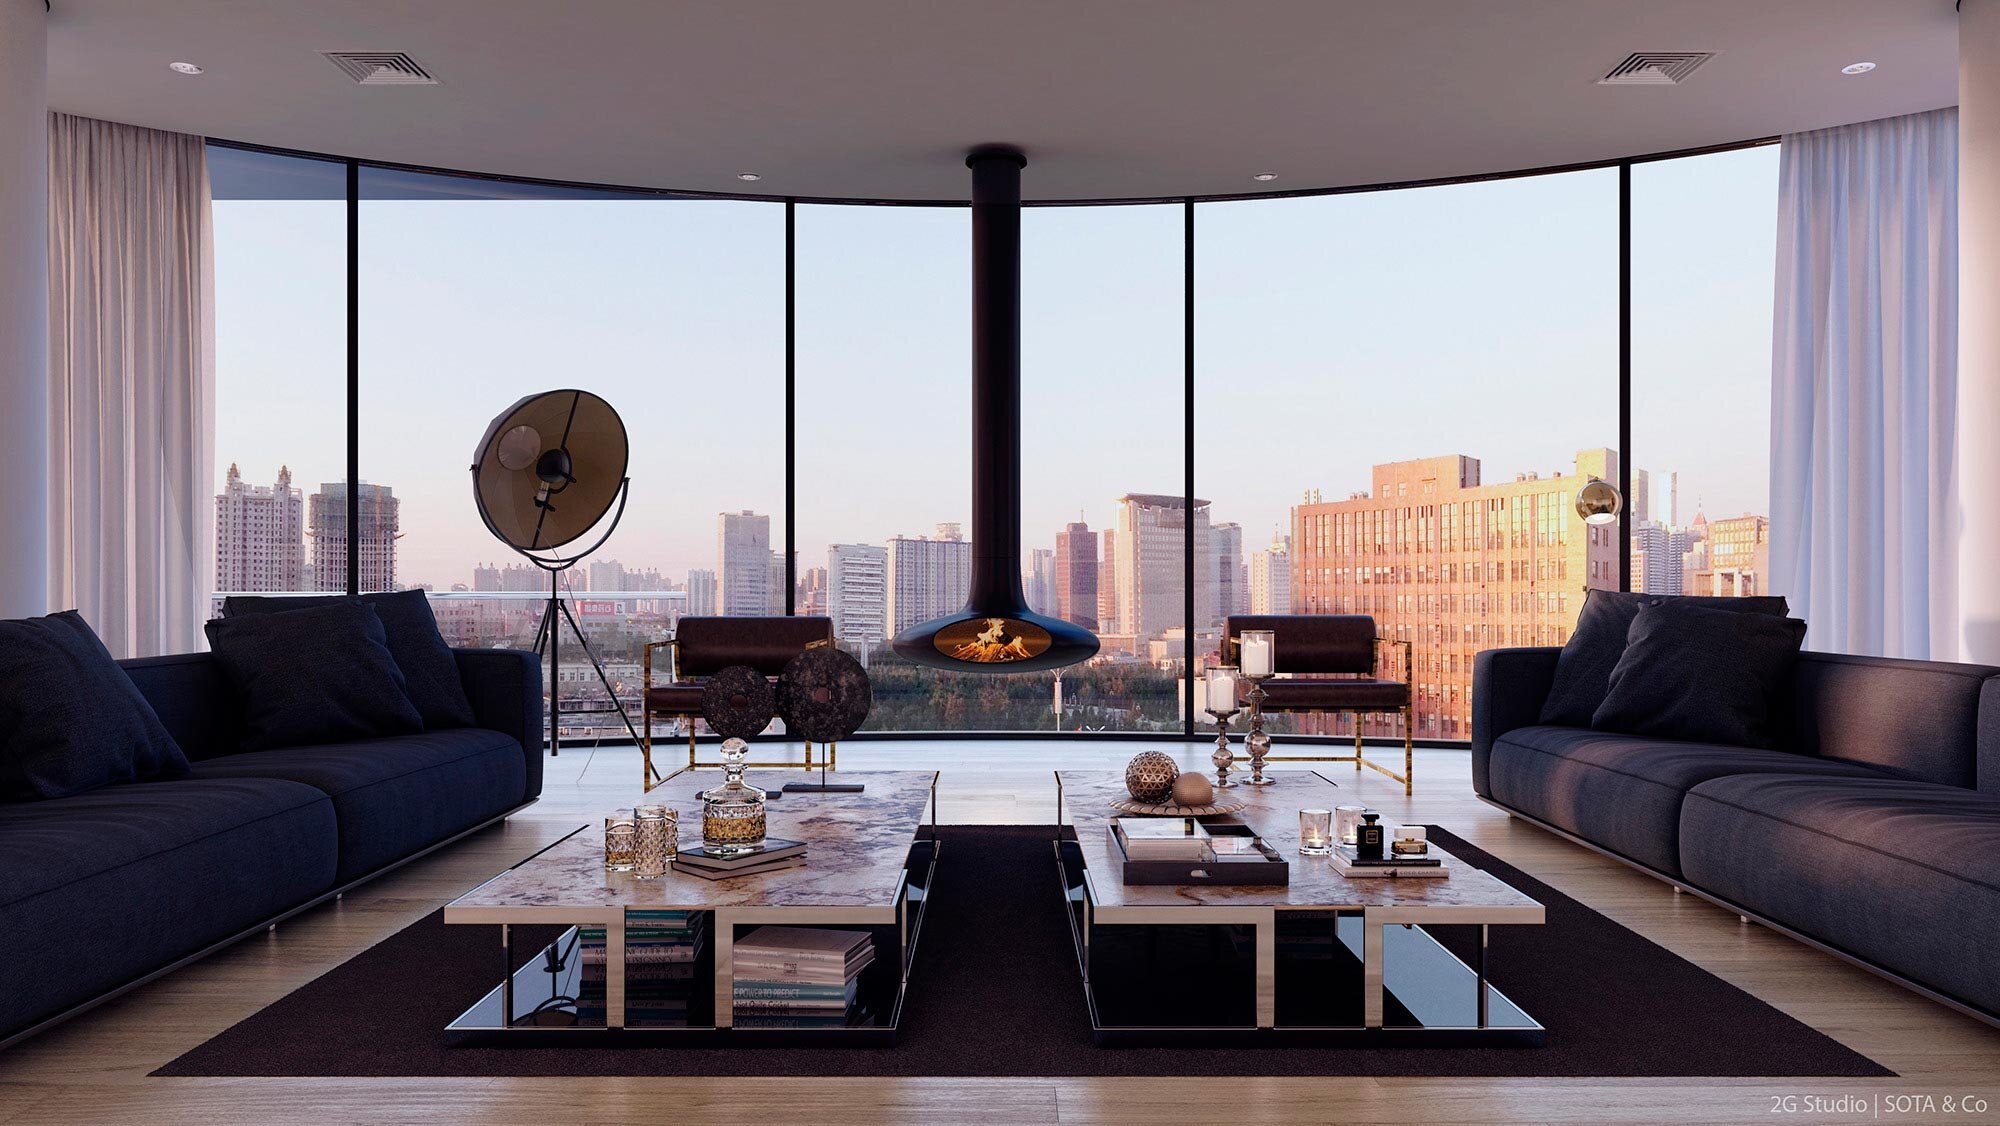
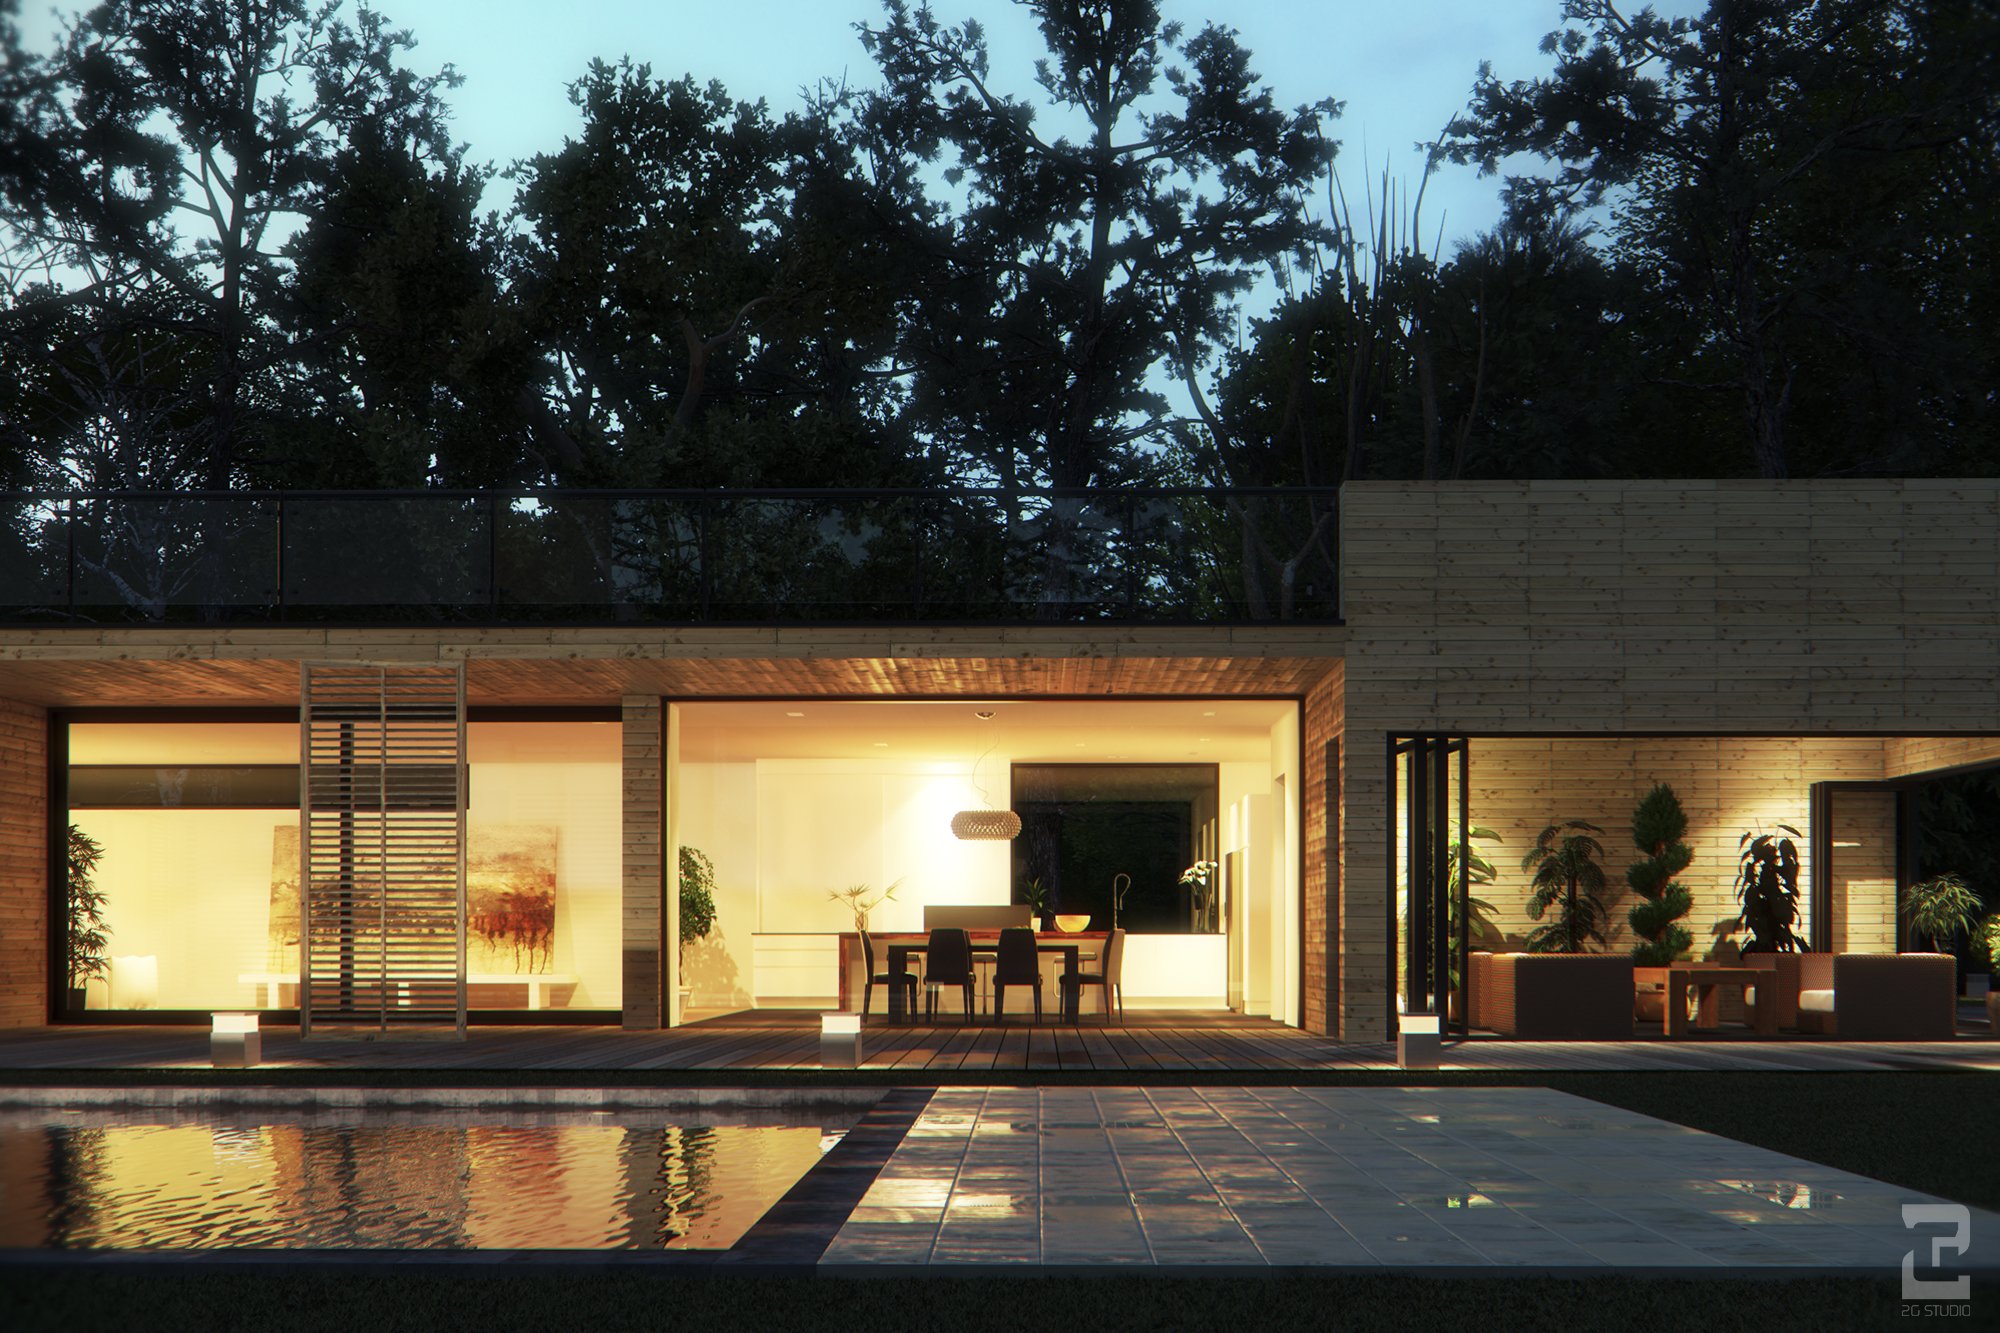
First, please take a look at our project “Duta Indah”, here we can see that the lighting itself isn’t too bright or too yellow, but just right that it shows what an early morning situation would look like in the bedroom. The light is soft, and when the light comes in contact with our skin it's warm and comforting. Check out our instagram posts for more of our emotionally bonding renders.
Strategic Lighting for Engaging Interiors
Light placement must be planned carefully with the viewer’s perspective in mind, the placement of light sources will be a key point in a viewer’s perspective when imagining how the room would feel like. Respect the purposes of each room, ensuring authenticity in how light interacts with textures and colors. Meaningful illumination should enhance the overall mood, avoiding irritation or distraction. Light bounces are also a key point in creating realistic renders, light bounces are just a part of the process that must be done to imitate real-world occurrences.
Consider light as a helpful guide, providing solutions to point out focal points and address any shadows that may hinder the visual experience. This approach allows its viewers to feel the realism, the real-life situation of what our render is trying to show. The usage of artificial lighting has always been to aid in our daily life, be it reading a book, or to provide necessary light sources. The key is to keep the placements realistic.
Determining Light Tone
Tone of light in renders depend on the reference, as well as the look and feel we want to achieve. Even though it is impossible to create the exact same image as the composition and materials might be different, the key in reference images is to create the same look and feel in our own render.
Cool-toned lighting evokes a modern, crisp feel similar to early morning freshness. Warm-toned lighting creates a cozy, inviting atmosphere.
Please do not get me wrong, but both cool and warm toned lighting can both achieve a fresh feel, but to each their own they serve their own purposes according to our needs. It all comes back to our reference images, and our game plan. There is no one stop formula in 3D rendering, it is a series of trial and errors. Remember, it is not the reference image we’re trying to recreate, but the look and feel of the reference image we want our image to have.
Common road-blocks when doing interior lighting
Sometimes, determining the direction of sunlight really impacts the storytelling in our images. Just a few degrees off can make a significant difference. The struggle usually lies in getting the sunlight angle right; it can be such a headache trying to position the sun accurately. Even a slight deviation can alter the outcome and tone drastically. Lighting is a process that requires resourcefulness and a lot of attempts.
“Achieving a similar look and feel to our reference is crucial, relying heavily on each artist's sense and artistic quality.” - Ryan Bagus Nur Alif, 3D Artist of 2G Studio
Aligning with references is challenging because it is not just about the technical aspects; it's about capturing the essence. Despite our best efforts, it's nearly impossible to match every element precisely due to the complexities involved. However, achieving a similar look and feel is crucial, relying heavily on each artist's sense and artistic quality.
A Balanced Blend
Occasionally as 3D Artists, our artistic senses make the most creative ideas. The issue in hand is when those ideas are not what the clients wanted initially, or different from what they had pictured in mind.
Just like coffee and milk, interior lighting consists of our client’s needs and our artistic senses. Where we are able to both fulfill our client’s requests and as 3d artists, put our skills to work. Provide drafts or examples if needed.
Remember, we are here to be the solution, the help our clients need to make their imagination to life. Make sure to communicate thoroughly with clients, both when jotting down their requests, or when you wanna suggest any ideas of your own. It is important that you and your client reach the same page of understanding, client’s happiness is our happiness as service providers. Then with that in mind, center our rendering around it. Convey the right message that you need to, through your render.
Interior lighting is not merely about illuminating spaces; it is about crafting experiences and evoking emotions. From the cool, crisp tones reminiscent of early morning freshness to the warm, inviting hues of a sunset, each lighting choice shapes the ambiance and mood of a scene.
The journey of perfecting interior lighting is not without its challenges. From navigating the complexities of sunlight direction to aligning with references while maintaining artistic integrity, it is a process that demands resourcefulness and perseverance. Remember to create a game plan, make a mood board, look for reference images that captures your ideas. Gameplans are a necessity, they help guide you to your desired lighting.

Tips on How to Make Clients Loyal or Returning: Insights from a 3D Architectural Visualization Rendering Studio
Unlock the secrets to client loyalty in 3D architectural visualization! Discover expert tips from a leading rendering studio, and transform your client relationships for lasting success.

Welcome to our guide on building lasting client relationships in the 3D architectural visualization world! I'm thrilled to share some valuable insights from our experience as a 3D architectural visualization rendering studio. We've had the privilege of working on numerous projects over the years, and we've discovered that making clients loyal or returning is all about creating a seamless, memorable experience. So, grab a coffee, get comfortable, and let's dive into the world of client loyalty.

Deliver Outstanding Quality
When it comes to 3D architectural visualization, quality is paramount. Your clients rely on you to bring their vision to life, and in our industry, first impressions matter.
Invest in the Latest Technology
Staying on the cutting edge of technology and software is essential. When I think back to one of our early projects, we were using outdated rendering software. It led to unnecessary delays and complications. The lesson learned was to invest in the latest tools, which not only speeds up the process but also ensures higher quality results.
So, don't hesitate to allocate resources for the best software and hardware in your studio. Your clients will notice the difference, and that's the first step toward building trust.

Personalize Your Services
One size doesn't fit all in architectural visualization. Each project is unique, and your clients have their distinct vision and requirements.
Understanding Unique Client Needs
A few years ago, we had a client who had a very specific vision for a luxury resort project. We took the time to understand their needs, their target audience, and the emotions they wanted to convey. The result was a project that exceeded their expectations, and it's a testament to the power of personalized service.
Remember, take the time to listen to your clients, ask questions, and ensure you're on the same page. Tailoring your services to their individual needs can make a world of difference.
Meet Deadlines Reliably
Meeting project deadlines is a fundamental aspect of building trust and maintaining client relationships.
Effective Project Management
One of our key learnings was the importance of effective project management. Clear milestones, well-defined tasks, and regular check-ins help ensure everything stays on track. It might sound like common sense, but it's surprising how many projects go off the rails due to poor management.
And remember, it's better to underpromise and overdeliver. Setting realistic timelines and expectations is key to consistently meeting deadlines.

Showcase a Strong Portfolio
Your portfolio is your calling card, showcasing your skills and capabilities. It's where potential clients look to gauge the quality of your work.
Highlight Past Projects
Our portfolio is like a scrapbook of the amazing projects we've been part of. We've learned that clients want to see not just your best work but also a variety of projects. It helps them understand your versatility and expertise. So, when you're building your portfolio, make sure it's a mix of different projects that highlight your skills.
Also, make sure to keep your portfolio up-to-date. If you've completed new projects, add them to your portfolio to show that you're actively engaged in your craft.

https://sasanadigital.com/apa-itu-customer-service/
Excellent Customer Service
Client satisfaction often hinges on the quality of your customer service. Be ready to assist and address concerns promptly.
Be Responsive
In a world of instant communication, being responsive is more important than ever. A prompt reply to an email or phone call can set a positive tone for your entire relationship. I remember a time when a client had an urgent question about a project, and our immediate response saved the day and cemented our reliability.
Address Feedback
Your clients' feedback is invaluable. We've had many instances where clients' feedback led to important improvements in our process. Don't just listen; act on their suggestions and show them that you're committed to making their vision a reality.
Consistency in Pricing
Transparency and consistency in pricing are crucial for long-term client relationships.
Avoid Hidden Costs
Hidden fees and unexpected cost increases are a surefire way to erode trust. From personal experience, I can tell you that this can lead to frustration and tarnish your reputation. It's essential to provide a clear and transparent breakdown of costs from the beginning.
Loyalty Discounts and Referral Rewards
To keep clients coming back, consider offering loyalty discounts for repeat customers or referral rewards for clients who bring in new projects. These incentives can strengthen your client relationships and help your business grow through word-of-mouth referrals.

Build Long-Term Relationships
Building long-term relationships goes beyond individual projects. It's about being there for your clients beyond the initial deliverables.
Post-Project Support
After the completion of a project, offer post-project support and maintenance services. This not only provides added value but also keeps the line of communication open. You never know when a client may need your expertise again.
Stay in Touch
Don't disappear after the project is done. Keep in touch with your clients through newsletters or updates. Share your latest work, industry insights, or even a friendly holiday greeting. It's a simple gesture that can go a long way in maintaining relationships.
Request and Act on Feedback
Feedback is a goldmine of information, helping you fine-tune your services and improve your client relationships.
Encourage Client Input
Make it a habit to actively seek feedback from your clients. You can do this through surveys, direct questions, or informal discussions. Show them that their opinions are valued, and you're committed to delivering a better experience.
Implement Changes
The most important part of collecting feedback is acting on it. We've learned that making improvements based on client input not only enhances our services but also builds trust. When clients see that you're committed to their satisfaction, they are more likely to return to you for future projects.

https://wedevs.com/blog/88677/trust-build-better-client-relationship/
Foster Trust and Transparency
Building trust and maintaining transparency are vital for lasting client relationships.
Be Honest and Transparent
Sometimes, things don't go as planned, and projects encounter unexpected challenges. In such situations, it's crucial to be honest and transparent with your clients. They'll appreciate your integrity, and it will strengthen their trust in your ability to handle adversity.
Communicate Effectively
Clear and open communication is the bedrock of trust. Keep your clients informed about the progress of their projects, and if issues arise, address them promptly. This level of communication ensures that they're never left in the dark.

Conclusion
Client loyalty and retention in the 3D architectural visualization industry are achievable by following these tips. Building trust through high-quality work, personalized service, reliable deadlines, and excellent customer service is the foundation for long-lasting relationships.
Maintaining a strong portfolio, being transparent in pricing, and building long-term relationships beyond the initial project are key strategies. Requesting and acting on feedback and fostering trust and transparency complete the picture.
Remember, it's all about creating an exceptional client experience. By implementing these strategies, you'll not only make your clients loyal and returning but also set your 3D architectural visualization studio on a path to enduring success. So, go ahead and apply these tips, and watch your client relationships thrive!

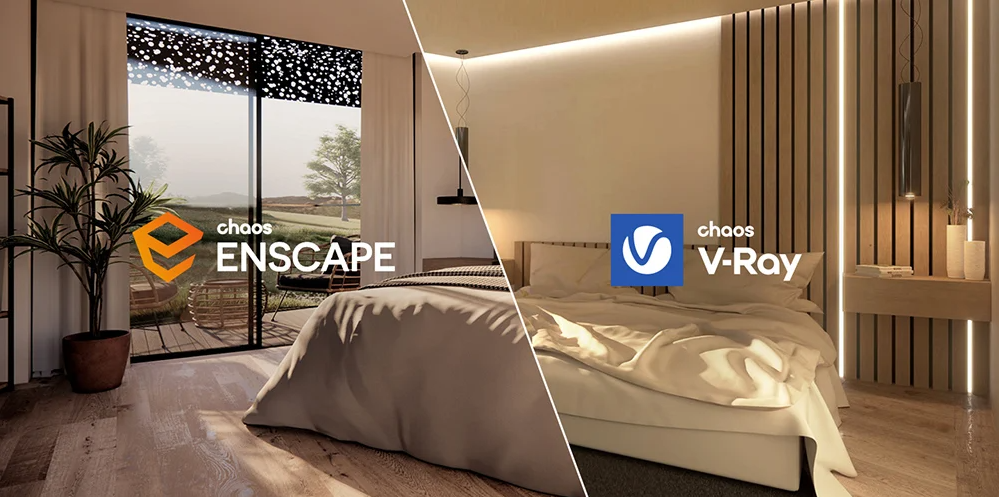
V-RAY, ENSCAPE | V-Ray vs. Enscape: A Comprehensive Comparison for 3D Rendering in Architectural Visualization
Uncover the 3D artist's perspective: V-Ray vs. Enscape - Which rendering software will make your architectural visions come to life? Explore their UI, speed, quality, and more in this in-depth comparison!
https://blog.enscape3d.com/combining-real-time-rendering-of-enscape-with-photorealism-of-v-ray
Welcome to the world of architectural visualization, where the power of 3D rendering can bring your creative designs to life. As a 3D artist with a specialization in architectural visualization, I understand the importance of choosing the right rendering software. In this article, we'll dive deep into a comparison between two popular choices: V-Ray and Enscape.
Introduction
3D rendering is the magic wand that transforms your design concepts into photorealistic visuals. The choice of rendering software can significantly impact your workflow and the quality of your output. Whether you're an experienced 3D artist or just starting out, the decision between V-Ray and Enscape is crucial. Let's explore the aspects that matter most when making this choice.
Background
Before we plunge into the comparison, let's get to know our contenders.

V-Ray: The Industry Giant
V-Ray is not just a rendering engine; it's an industry giant that's been around for quite some time. Developed by Chaos Group, V-Ray is renowned for its exceptional rendering quality and flexibility. It's a go-to choice for professionals in architectural visualization, film, and design industries.
Enscape: The Real-Time Contender
Enscape, on the other hand, is a relatively new kid on the block, but it's making waves in the world of real-time rendering. It's known for its impressive speed and efficiency in creating real-time, interactive 3D visualizations. With its user-friendly approach, it's quickly becoming a favorite for architects and designers.

User Interface and Ease of Use
Your journey with any software starts with its user interface. Let's see how V-Ray and Enscape compare.
V-Ray: The Learning Curve
V-Ray's user interface may seem intimidating to beginners. Its plethora of settings and options can be overwhelming. However, if you're willing to invest time in learning, V-Ray can offer immense control and customization options, making it a favorite among seasoned professionals.
Enscape: User-Friendly Approach
Enscape shines in terms of user-friendliness. Its real-time interface is straightforward, and you can achieve impressive results with minimal effort. This simplicity makes it a fantastic choice for architects and designers who may not have extensive 3D rendering experience.
Personal Anecdote: I remember the first time I tried V-Ray. I was fascinated by the possibilities it offered but slightly overwhelmed by the sheer number of settings. However, with practice and online resources, I mastered it. Enscape, on the other hand, felt like a breeze right from the start. It's a matter of personal preference and your specific needs.

Rendering Quality
As a 3D artist, the quality of your renderings is paramount. Let's see how V-Ray and Enscape measure up in this aspect.
V-Ray: The Benchmark for Realism
V-Ray is renowned for its exceptional rendering quality. It excels in creating realistic scenes with intricate lighting and materials. The subtlety and accuracy in V-Ray's renderings make it a preferred choice for architectural visualization when realism is a top priority.
Enscape: Real-Time Brilliance
Enscape, although real-time, doesn't fall short in rendering quality. It offers impressive realism for quick presentations and design iterations. However, it might not reach the same level of photorealism as V-Ray, but it's more than sufficient for most architectural visualization projects.

https://www.renderedreality.com.au/understanding-3d-rendering-process/
Rendering Speed and Performance
The speed of rendering is a critical factor, especially when meeting tight project deadlines.
V-Ray: Patience Pays Off
V-Ray is known for its attention to detail, but this often comes at the cost of rendering time. The complex calculations it performs can result in longer rendering times, requiring patience and powerful hardware for efficient operation.
Enscape: The Need for Speed
Enscape's real-time rendering capabilities shine in this department. It offers near-instant feedback on changes, making it a fantastic choice for design reviews and client presentations. Its efficiency reduces the waiting time for results significantly.
Personal Anecdote: I once had a project with an urgent deadline. I decided to use Enscape for its speed, and I was able to showcase multiple design iterations to the client in real-time, which impressed them greatly. However, for the final presentation, I switched to V-Ray to ensure the highest quality output.

https://www.nvidia.com/en-us/geforce/news/nvidia-rtx-real-time-game-ray-tracing/
Real-time Rendering Capabilities
In the age of real-time visualization, this aspect can't be overlooked.
V-Ray: Near Real-Time With V-Ray Vision
V-Ray has stepped up its real-time game with "V-Ray Vision." While it may not match the instant feedback of Enscape, it allows you to interactively adjust materials and lighting in the viewport, offering a blend of speed and quality.
Enscape: Real-Time Interactivity
Enscape's real-time interactivity is its hallmark. With Enscape, you can effortlessly navigate your 3D scenes, adjusting lighting and materials in real-time. It's a game-changer for design presentations and collaborations.
Workflow Integration
Your rendering software needs to seamlessly integrate with your 3D modeling and CAD software.
V-Ray: The Industry Standard
V-Ray boasts excellent integration with popular software like SketchUp, 3ds Max, and Rhino. It's considered an industry standard, and you'll find plenty of resources and plugins to enhance your workflow.
Enscape: Efficient Integration
Enscape is no slouch in this department either. It seamlessly integrates with leading software such as SketchUp, Revit, and ArchiCAD. Its efficiency in data transfer and real-time updates within the host software streamlines the design process.
Personal Anecdote: I remember a project where I had to collaborate with a team using different 3D software. V-Ray's compatibility with multiple platforms made the transition between applications smoother. On the flip side, for a solo project, I found Enscape's real-time integration a time-saving blessing.

Customization and Flexibility
The ability to customize materials and lighting is essential for creating unique visualizations.
V-Ray: Limitless Customization
V-Ray offers extensive options for customization. You can create highly detailed materials, control lighting down to the minute details, and even utilize scripting for advanced workflows. If you're a control enthusiast, V-Ray has you covered.
Enscape: Streamlined Efficiency
Enscape, while not as in-depth in terms of customization, offers a streamlined approach. It simplifies the process by providing pre-set materials and lighting options, making it quick and efficient for architectural visualization.
Cost and Licensing
Your budget plays a pivotal role in your software choice.

https://www.chaos.com/pricing
V-Ray: The Investment
V-Ray, being an industry heavyweight, comes with a price tag. Its licensing models can range from subscriptions to perpetual licenses, catering to individual freelancers and large studios. However, it's an investment that pays off in terms of rendering quality and versatility.

https://enscape3d.com/pricing/
Enscape: Budget-Friendly
Enscape offers a more budget-friendly pricing model. It primarily operates on a subscription basis, making it accessible to a broader audience. This affordability is appealing to individual artists and smaller design firms.
Support and Community
Access to support and a thriving user community can be a lifesaver when you encounter issues or need advice.

https://forums.chaos.com/
V-Ray: Robust Support
V-Ray has a well-established user community and extensive documentation. Technical support is readily available, ensuring you can find solutions to most problems you encounter.

https://forum.enscape3d.com/
Enscape: Growing Community
Enscape's community is rapidly expanding. While it may not have the same vast resources as V-Ray, it's growing steadily, and the Enscape team is actively engaged with users, providing assistance and updates.

Conclusion
So, which one should you choose? It all boils down to your specific needs and preferences.
If you value meticulous control, supreme rendering quality, and are willing to invest time and effort, V-Ray is the classic choice.
On the other hand, if you require speed, ease of use, and real-time interactivity for design presentations, Enscape is a fantastic option.
As for me, I've found that having both V-Ray and Enscape in my toolkit offers the best of both worlds. I use V-Ray for high-quality final presentations and Enscape for design reviews and quick client meetings. The versatility of using both ensures I'm well-prepared for any project that comes my way.
Final Thoughts
The world of 3D rendering and architectural visualization is evolving at a rapid pace. New software options continue to emerge, pushing the boundaries of what's possible. Whether you choose V-Ray, Enscape, or a combination of both, keep an eye on the exciting trends and innovations in the field. Your choices today will shape the stunning visualizations of tomorrow. Happy rendering!
Find this blog helpful? Check out our other blogs about 3d rendering softwares through one click! See you on the other side.

INTEL, AMD, NVIDIA | Minimum Laptop Requirements for 3D Rendering: What Factors to Consider
Discover the key factors to select the ideal laptop for 3D rendering as shared by an experienced 3D artist. From CPU to software choices, find the perfect match for your creative journey.

https://www.expertreviews.co.uk/laptops/1413322/best-budget-gaming-laptop-of-2021-the-cheapest-gaming-notebooks-from-700
Hey there, fellow 3D enthusiast! I'm thrilled to share my experiences as a 3D artist specializing in architectural visualization, and offer some guidance on choosing the right laptop for 3D rendering. Trust me, I know firsthand the frustrations of trying to render a stunning architectural masterpiece on a sluggish machine. But fear not, with the right laptop, you can take your 3D rendering game to the next level.
Introduction
3D rendering has become a staple in various industries, from architecture and gaming to animation and product design. As the demand for stunning visual representations grows, so does the need for capable hardware. Your laptop is the workhorse behind those mesmerizing visuals, and selecting the right one is crucial for a smooth and efficient workflow.
In this article, I'm going to walk you through the critical factors to consider when choosing a laptop for 3D rendering. Let's dive right in!

Understanding 3D Rendering
What is 3D Rendering?
Before we delve into the laptop specifications, let's clarify what 3D rendering is. It's the process of transforming 3D models into 2D images or animations, giving life to your creations. From architectural visualization to creating game environments, 3D rendering is a computational-intensive task that demands substantial processing power.
The Resource-Intensive Nature of 3D Rendering
3D rendering is like baking a complex cake. It requires the right ingredients (hardware) and time (software) to produce a masterpiece. Complex scenes with intricate lighting, textures, and realistic materials can take hours, if not days, to render. Inadequate hardware can make this process excruciatingly slow, and nobody has time for that.
Hardware Requirements
Now, let's discuss the heart of the matter: the hardware. Your laptop's hardware components are the key determinants of rendering speed and quality.

https://www.intel.co.id/content/www/id/id/products/details/processors/core.html
Central Processing Unit (CPU)
Your CPU is like the chef in the kitchen, orchestrating the entire rendering process. A powerful CPU is paramount. Personally, I've found that an Intel i7 or i9 or an AMD Ryzen 7 or 9 CPU works wonders for 3D rendering tasks. More cores and higher clock speeds equate to faster render times.

https://www.msi.com/Graphics-Card/GeForce-RTX-4090-SUPRIM-X-24G
Graphics Processing Unit (GPU)
The GPU, on the other hand, is the artist's brush. It handles complex calculations and ensures smooth interaction with your 3D scenes. NVIDIA's RTX series or AMD's Radeon GPUs are fantastic choices. They offer real-time ray tracing and acceleration for rendering tasks. In my experience, investing in a high-end GPU makes a world of difference in the final render quality.

https://www.pcworld.com/article/1939595/should-you-upgrade-your-ram-5-things-to-consider.html
Random Access Memory (RAM)
Think of RAM as your workspace - the more, the better. For smooth rendering, aim for a laptop with at least 16GB of RAM. Complex scenes, especially those in architectural visualization, can be memory hogs. Don't let your laptop's memory constraints hinder your creative flow.
Storage
When it comes to storage, a Solid State Drive (SSD) is non-negotiable. It significantly speeds up data access, reducing load times for your 3D projects. I'd recommend a laptop with at least 512GB of SSD storage. For larger projects, consider models with 1TB or more. I once had an HDD in my laptop, and let's just say, it was like trying to run a marathon with ankle weights.
Cooling System
A robust cooling system is often overlooked but is crucial for maintaining performance during extended rendering sessions. Laptops with efficient cooling systems ensure that your hardware doesn't overheat and throttle performance. Always opt for a laptop with a good thermal design; your renders will thank you later.
https://blog.enscape3d.com/enscape-for-sketchup-2022
Software and Operating System
Compatible Software for 3D Rendering
Different 3D rendering software applications have specific hardware requirements. For instance, Blender is more flexible in terms of hardware, whereas rendering with V-Ray might require beefier specifications. Always check the recommended hardware specifications for the software you intend to use. In my experience, the software you choose might dictate your hardware needs.
The Choice of Operating System
The choice between Windows, macOS, or Linux is a matter of personal preference, but it can affect your 3D rendering experience. Windows tends to have broader software support, while macOS boasts excellent display quality. Linux is favored by some for its customization. Your chosen OS can also influence your laptop options, so consider your priorities when making this decision.
Display and Screen Size
The Importance of a High-Resolution Display
When creating and rendering 3D models, the display is your canvas. A high-resolution screen is a must. I'd recommend at least a Full HD (1920x1080) display. It's also essential to consider color accuracy and calibration. A laptop with a good color-accurate display ensures that your rendered images match your artistic vision.
Screen Size and Portability
While a large display is fantastic for detail work, it can make your laptop less portable. Consider a balance between screen size and portability. If you require a larger canvas for your 3D work, you can always connect your laptop to an external monitor when you're at your workstation.

Battery Life and Portability
Battery Life Considerations
For those who need to render on the go, battery life is a critical factor. Rendering consumes a lot of power, so don't expect your laptop to last all day on a single charge. Make sure your laptop has a decent battery life and, if possible, invest in a spare battery or a portable charger for those long rendering sessions away from power outlets.
The Trade-Off Between Performance and Portability
Balance is key. If you're constantly on the move, you'll want a laptop that's both powerful and portable. Some laptops strike this balance beautifully, offering high performance while remaining relatively light and slim. Don't compromise on performance just for portability; there are options that offer the best of both worlds.
Budget Considerations
Setting a Realistic Budget
Now, let's talk about the elephant in the room - your budget. Laptops with top-of-the-line hardware can be pricey. However, it's essential to set a realistic budget based on your needs. Remember, investing in a powerful laptop is an investment in your creative capabilities.
Balancing Cost with Performance and Longevity
A laptop with the right balance of cost and performance is like gold in the world of 3D rendering. While it's tempting to go all-in on the most expensive model, it's often not necessary. Sometimes a mid-range laptop can deliver impressive results. Look for laptops that provide the best value for your specific rendering needs.
The Impact of Future-Proofing
Think about the future. Technology evolves quickly, and your laptop needs to keep up. While it's impossible to future-proof completely, investing in a laptop with slightly better specs than you currently need can extend its longevity. It's a bit like buying insurance for your creative endeavors.
User Reviews and Recommendations
The Value of User Reviews
As a 3D artist, I can't emphasize enough how valuable user reviews and recommendations can be. These insights come from real-world experiences, and they can help you make an informed decision. Check out online forums, community discussions, and reviews from other 3D artists to get a sense of which laptops have performed well in rendering tasks.

https://www.digitaltrends.com/computing/dell-xps-15-9520-review/
Recommendations for Specific Laptop Models
While it's crucial to tailor your laptop choice to your specific needs, I can offer some laptop models that have received acclaim in the 3D rendering community. Keep in mind that newer models may have been released since my last update, so always check for the latest options:
Dell XPS 15: A great balance of performance and portability, with a fantastic 4K display.
Razer Blade: Known for its sleek design and powerful hardware, ideal for 3D rendering.
MSI Creator Series: Offers various models catering to different budgets and rendering needs.
ASUS ROG Zephyrus: If you need a powerful gaming laptop that can double as a rendering workhorse, this is a solid option.

Conclusion
In conclusion, choosing the right laptop for 3D rendering is a crucial step in your creative journey. Your hardware significantly impacts your productivity, rendering speed, and the quality of your final output.
By carefully considering the CPU, GPU, RAM, storage, cooling, software, and display, and balancing these factors with your budget and portability needs, you can find the perfect laptop that suits your 3D rendering endeavors. Don't forget to gather insights from user reviews and recommendations in the community to make an informed decision.
Investing in the right laptop is investing in your creative capabilities, allowing you to bring your 3D architectural visions to life with speed and finesse. So, gear up, and get ready to embark on your 3D rendering adventures with the perfect laptop by your side!

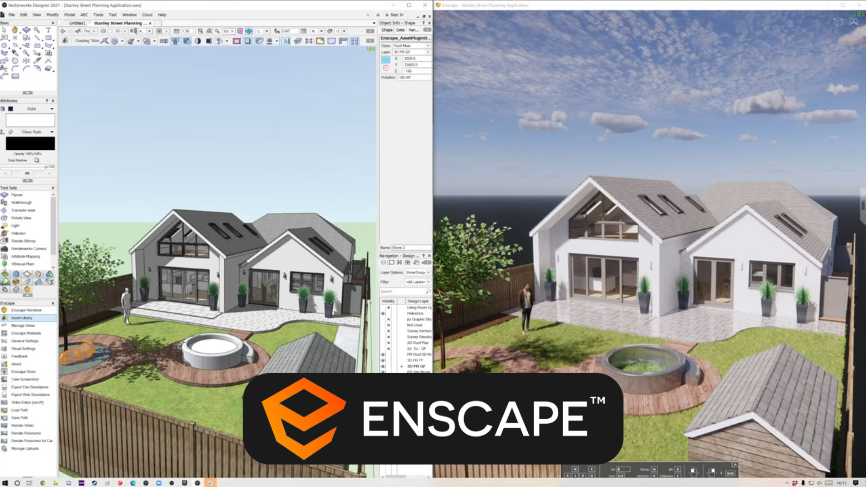
ENSCAPE | Optimize Enscape for Large-Scale Projects: Tips for Exceptional Architectural Visualizations
Unlock the full potential of Enscape for large-scale architectural projects with expert tips and personal insights. Elevate your visualization game with real-time rendering and seamless client interactions.
Hey there, fellow 3D artists and architectural visualization enthusiasts! If you're diving into the world of large-scale architectural projects, you know how essential it is to create stunning visualizations that leave your clients and colleagues in awe. That's where Enscape comes in as a game-changer. As an experienced 3D artist specializing in architectural renderings, I've been through the highs and lows of working on large-scale projects. In this article, I'll share my tips and insights on how to optimize Enscape for these complex endeavors.\

https://enscape3d.com/
The Power of Enscape in Architectural Visualization
Before we dive into the nitty-gritty of Enscape optimization, let's take a moment to understand why Enscape is a go-to tool for architectural visualization, especially in large-scale projects.
Enscape's real-time rendering capabilities are nothing short of magic. It allows you to make real-time changes and see the results immediately, making it an invaluable asset when you need to iterate quickly and efficiently. In a world where clients want to see results in real-time, Enscape is your best friend.
Success Stories with Enscape
To emphasize the power of Enscape, let me share a personal story. I was once working on a massive urban development project. The client needed to visualize how the cityscape would look with the new structures and landscapes integrated. Enscape made it possible to explore different design scenarios in real time, from changing the materials of skyscrapers to adjusting the lighting conditions for a park at sunset. The client was blown away by the ability to witness the project's potential before it even started. Enscape's realism, combined with real-time changes, makes it a game-changer in large-scale projects.

https://www.cgdirector.com/best-computer-3d-modeling-rendering/
Hardware and Software Requirements
Before we get into the creative aspects of Enscape, let's talk hardware and software. The right setup can make or break your Enscape experience.
Hardware Specifications
For large-scale projects, you'll want a robust computer. Ideally, you should have a high-performance CPU, a powerful GPU, and a generous amount of RAM. A solid-state drive (SSD) will speed up your workflow significantly, so don't overlook that.
Personal anecdote time: I once tried to run Enscape on a budget laptop for a large-scale project. Let's just say it didn't end well. The constant lag and crashes were a nightmare. So, invest in quality hardware upfront.
Choice of 3D Modeling Software
Enscape plays nicely with several 3D modeling software options like SketchUp, Revit, Rhino, and more. Ensure you're using the right version and keep both Enscape and your modeling software updated to leverage the latest features and improvements.
Workflow Efficiency
Efficiency is crucial when dealing with large-scale projects. An organized workflow can save you time and frustration.
Organizing Project Files and Assets
Consider creating a well-structured folder hierarchy for your project files. Keep your 3D models, textures, and Enscape assets neatly organized. It might seem like a small thing, but trust me, it'll save you from hours of searching for that one texture map you need.
Project Management Tools
Using project management tools like Trello, Asana, or even just a good old spreadsheet can help you stay on top of your tasks and deadlines. It's a lifesaver for coordinating with team members and keeping clients in the loop.

Optimizing 3D Models
Now, let's talk about 3D models. They are the backbone of any architectural visualization, and for large-scale projects, you need to be mindful of their complexity.
Reducing Model Complexity
When working on large-scale projects, intricate details can slow down your workflow. Simplify complex geometry, especially for elements that aren't in the focal point of the visualization. Trust me; this will have a significant impact on performance.
UV Mapping and Texture Optimization
Another personal lesson here: I once imported a highly detailed 3D model into Enscape without optimizing the UV mapping. It resulted in poor texture quality and an unnecessarily large file size. Always ensure that your UV mapping is top-notch, and consider optimizing textures for better Enscape performance.

Lighting and Materials
Lighting and materials play a pivotal role in creating a realistic architectural visualization.
Proper Lighting Techniques
In large-scale projects, lighting can be a challenge, especially for outdoor scenes. Use natural light sources like the sun or sky. Enscape's lighting features, like the "Sun" setting, make it easier to create realistic lighting conditions. Experiment with the time of day to find the perfect lighting angle for your project.
Materials for Realism
Creating and optimizing materials is another key to success. Enscape offers a wide range of materials, but sometimes you'll need custom ones. My advice is to spend time tweaking the material settings. A slight bump in roughness or a subtle reflection can make your visuals pop.
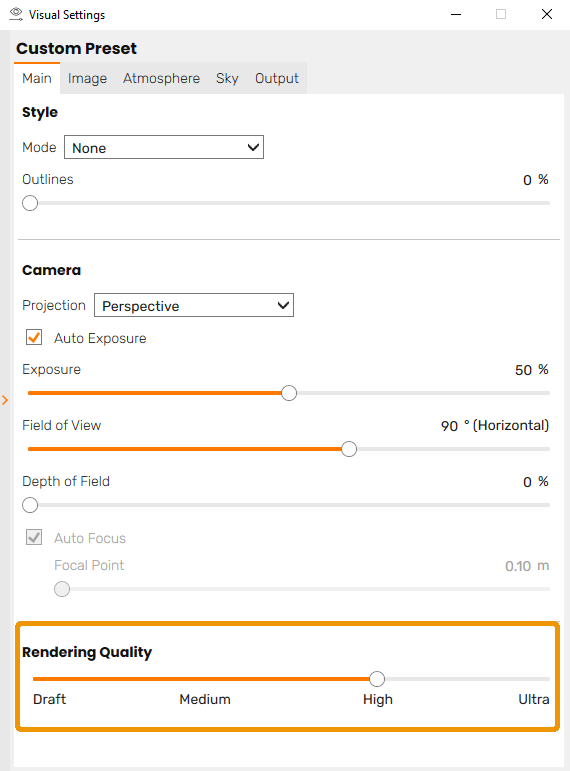
https://learn.enscape3d.com/blog/knowledgebase/rendering_quality/
Enscape Settings and Rendering
Now, let's get into the heart of Enscape optimization.
The Right Settings
Enscape offers a plethora of settings, and understanding them is crucial. Don't shy away from creating custom settings that suit your project's needs. A well-optimized setting can drastically improve the quality and performance of your renders.
Region Rendering
In large-scale projects, it's not uncommon to have complex scenes. If you're working on a specific area or detail, use the region rendering feature. This way, you can concentrate Enscape's power where you need it, leaving the rest of your scene to render more quickly.
Vegetation and Landscaping
For outdoor scenes in large-scale projects, vegetation and landscaping are crucial.
Optimizing Vegetation
Vegetation can be resource-intensive. Consider using proxy or low-poly models for distant trees and plants. Save the high-poly stuff for close-up shots. This approach will help maintain a smooth performance.
Creating Lush Environments
When it comes to outdoor environments, details matter. Enscape provides various assets for vegetation, but don't forget to tweak them to your liking. Add details like fallen leaves or small rocks to make your outdoor spaces feel more realistic.

Post-Processing and Final Touches
The magic doesn't stop with Enscape's render. You can take your visuals to the next level with post-processing.
The Power of Post-Processing
Post-processing software like Adobe Photoshop or Lightroom can be your best friend. It allows you to fine-tune your renders, adjust colors, contrast, and even add atmospheric effects. For large-scale projects, this extra touch can make a world of difference.
Feedback and Revisions
Never underestimate the value of feedback. Share your Enscape renders with clients and colleagues. Sometimes, their input can lead to small adjustments that significantly improve the final result.
Collaboration and Client Interaction
In large-scale projects, collaboration is key. Engaging clients and team members effectively can make your life easier.
Presenting Enscape Visualizations
Personal anecdote: I once presented a client with a walk-through using Enscape's live link feature. It was a game-changer. The ability to make real-time adjustments as the client provided feedback was a game-changer. They felt involved and could see the changes right before their eyes, making the decision-making process smoother.
The Live Link Feature
Enscape's live link feature enables you to connect your modeling software with Enscape. This means that any changes you make in your model will instantly reflect in Enscape. It's like magic, and clients love it.
Troubleshooting and Performance Enhancement
Even with all the tips and tricks, you might encounter issues.
Common Issues and Solutions
If you run into problems like crashes or rendering errors, don't panic. Enscape's support and community forums are valuable resources for troubleshooting. Chances are, someone else has faced a similar issue and found a solution.
Further Performance Optimization
For the most resource-intensive projects, consider setting up a dedicated rendering machine. This can significantly speed up the rendering process and free up your main computer for continued work.

Conclusion
In the world of architectural visualization, Enscape is a powerful tool that can take your large-scale projects to new heights. By following the tips and techniques outlined in this article, you'll be well on your way to creating exceptional visualizations that leave a lasting impression.
Remember to invest in the right hardware, keep your workflow organized, and optimize 3D models, lighting, and materials. Fine-tune your Enscape settings, make use of region rendering, and add lush vegetation to your scenes. Don't forget the magic of post-processing, and always embrace feedback from clients and team members.
The collaboration features and live link functionality in Enscape will make your interactions smoother and more engaging. And if you encounter any hiccups along the way, the troubleshooting tips and performance enhancement suggestions will help you overcome them.
So, get out there and start optimizing your Enscape experience for those large-scale architectural projects. Your clients and colleagues will thank you for it, and you'll be well on your way to becoming a true Enscape master. Happy rendering!
Recommended PC Specs for 3D Rendering: A Comprehensive Guide
Discover the perfect PC specs for 3D rendering in architectural visualization. Get expert advice on CPUs, GPUs, RAM, and more in our comprehensive guide.

https://motionographer.com/2018/04/06/weapon-of-choice-building-a-gpu-pc/
Hey there, fellow 3D artists and enthusiasts! If you're diving into the captivating world of architectural visualization or 3D rendering, you're probably well aware that the right PC specs can make all the difference. As someone who has spent countless hours crafting 3D architectural renderings, I know the pains of slow render times and the joy of a smooth, efficient workstation. In this article, we'll embark on a journey to demystify the world of PC specifications for 3D rendering. By the time you're done reading, you'll be equipped with the knowledge to make the right PC choice for your rendering needs.
Understanding the Basics of 3D Rendering
What's 3D Rendering Anyway?
Before we dive into PC specs, let's make sure we're on the same page about what 3D rendering entails. Essentially, 3D rendering is the process of transforming 3D models into 2D images or animations. In the world of architectural visualization, this means turning your meticulously designed building plans into realistic visualizations that clients can understand and appreciate.
The Hardware Demands
3D rendering is a computationally intensive task that pushes your PC's components to their limits. A powerful PC is essential for handling the complex calculations and simulations needed to create stunning architectural visualizations. Now, let's explore the key components that make up a rendering powerhouse.
https://www.intel.co.id/content/www/id/id/products/details/processors/core.html
CPU (Central Processing Unit)
Your CPU, often referred to as the brain of your PC, plays a crucial role in 3D rendering.
Cores and Clock Speed
In the world of 3D rendering, more cores usually translate to better performance. Rendering software like Blender, 3ds Max, and V-Ray love to chew through cores, so investing in a CPU with a high core count is often worth the expense. Additionally, a high clock speed will ensure your CPU handles single-threaded tasks efficiently.
Personal Anecdote: I remember the days of using a quad-core CPU and watching my renders take ages to complete. Upgrading to an octa-core CPU with a higher clock speed was a game-changer, drastically reducing my rendering times.
Recommendations for CPUs
Budget-Friendly: AMD Ryzen 7 5800X or Intel Core i7-12700K
High-End: AMD Ryzen 9 5950X or Intel Core i9-12900K

https://www.nvidia.com/content/dam/en-zz/Solutions/design-visualization/quadro-product-literature/quadro-rtx-8000-us-nvidia-946977-r1-web.pdf
GPU (Graphics Processing Unit)
The GPU is responsible for rendering the visual elements in your scenes, making it an essential component for real-time visualization and final renders.
Gaming vs. Workstation GPUs
While gaming GPUs can handle some rendering tasks, workstation GPUs like NVIDIA Quadro and AMD Radeon Pro are designed for professional 3D work. They're optimized for stability and performance in rendering applications.
Recommendations for GPUs
Gaming/Prosumer: NVIDIA GeForce RTX 3080 or AMD Radeon RX 6900 XT
Workstation: NVIDIA Quadro RTX 6000 or AMD Radeon Pro WX 8200
https://www.pcworld.com/article/1939595/should-you-upgrade-your-ram-5-things-to-consider.html
RAM (Random Access Memory)
RAM acts as a fast, temporary storage for your computer to quickly access data.
Capacity and Speed
When working with large architectural models, you'll want a healthy dose of RAM. Consider 32GB as a minimum for architectural visualization, and if your budget allows, go for 64GB or more. Higher RAM speed will also help in data transfer and real-time previews.

Storage Solutions
The right storage setup can make a substantial difference in rendering speed and overall PC performance.
The Importance of SSDs
Solid-State Drives (SSDs) are a game-changer. They are significantly faster than traditional Hard Disk Drives (HDDs) and make loading large files and scenes a breeze.
Personal Anecdote: When I upgraded from an HDD to an SSD, I couldn't believe the difference. Loading my architectural models and rendering projects became a breeze, and my productivity skyrocketed.
Recommendations for Storage
Primary Drive: 1TB NVMe SSD for your OS and software.
Secondary Drive: 2TB or more SSD for project files and rendering cache.
Cooling and Case Design
Efficient cooling is often overlooked but critical for a rendering PC.
Efficient Cooling
Adequate cooling ensures that your CPU and GPU operate at peak performance without overheating. Look for cases with good airflow and invest in quality cooling solutions.

Power Supply Unit (PSU)
A high-quality PSU is essential for a stable and reliable rendering PC.
PSU Efficiency and Wattage
Choose a power supply with at least an 80 PLUS Bronze certification to ensure efficiency. Calculate your power needs based on your PC's components and ensure the PSU can handle it.
Consideration for Overclocking
The Temptation of Overclocking
Overclocking can provide a significant performance boost, but it comes with risks. It's like fine-tuning a sports car; it can be exhilarating, but you must be careful not to push too far.
Personal Anecdote: I once pushed my CPU too hard while experimenting with overclocking and, unfortunately, fried it. So, if you're planning to overclock, do your research and proceed with caution.
Operating System and Software
Operating Systems
Windows is the most common choice for 3D rendering, but Linux can be a great alternative if you're tech-savvy. Your choice should align with your software and workflow.
Software Compatibility
Ensure your software, plugins, and drivers are compatible with your chosen operating system.
Essential Software Tools
3D Modeling and Rendering: Blender, 3ds Max, Cinema 4D
Realistic Rendering: V-Ray, Corona Renderer, Octane Render
Post-Processing: Adobe Photoshop, Affinity Photo
Building or Buying?
Building Your Own PC
Building your PC can be a rewarding experience and allows you to customize every component. However, it requires technical expertise.
Buying a Pre-Built Workstation
Pre-built workstations are convenient and come with warranties, but you may have less control over the components. Research trusted brands like Dell, HP, or Lenovo for reliable workstations.
Budget Considerations
Setting Your Budget
Your budget should be a key consideration in choosing your PC specs. Determine how much you can allocate to your rendering workstation.
Budget Options
Low Budget: Start with a mid-tier CPU and GPU, upgrading as you go.
Mid-Range Budget: Invest in a powerful CPU and GPU combo with ample RAM.
High-End Budget: Go all-out with top-of-the-line components for maximum performance.
Maintenance and Upgrades
Regular Maintenance
Keep your PC clean, well-ventilated, and free from dust to ensure consistent performance.
Upgrades
As technology evolves, consider upgrading your GPU, RAM, or storage to keep your PC at the cutting edge.
Conclusion
In the world of 3D rendering, your PC is your ultimate tool. Whether you're a seasoned pro or just starting your journey in architectural visualization, investing in the right PC specs is essential for unleashing your creativity and productivity. I hope this guide has shed light on the often complex world of PC specifications, helping you make informed decisions and ultimately elevating your rendering game. So, go ahead, build your dream rendering machine, and let your architectural visions come to life on screen.

V-Ray, Lumion, Enscape: Which is the Best Paired with SketchUp for Architectural Rendering?
Discover the ideal rendering software for your SketchUp architectural projects. Dive into the strengths and limitations of V-Ray, Lumion, and Enscape in this comprehensive guide by an experienced 3D artist.

Hey there, fellow 3D enthusiasts! If you're like me, you probably spend countless hours perfecting your architectural visualizations in SketchUp. But there's one important question we all need to answer: which rendering software pairs best with SketchUp? Well, fret not, because I've got you covered. I'm here to help you navigate the world of V-Ray, Lumion, and Enscape, sharing my personal experiences and insights to guide you in making the right choice for your projects.
https://www.sketchup.com/
The SketchUp Advantage
Before we dive into the nitty-gritty of these rendering software options, let's acknowledge the powerhouse that is SketchUp. It's intuitive, user-friendly, and incredibly popular in the architectural industry. SketchUp is where our 3D dreams take shape, and it's essential to choose a rendering partner that complements its strengths.

https://www.archinspirations.com/blog/modern-house-exterior-rendering-vray-for-sketchup
V-Ray for SketchUp
Strengths
Let's kick things off with V-Ray. Picture this: you've spent weeks crafting the perfect 3D model in SketchUp, and now it's time to bring it to life. V-Ray is your go-to for photorealistic rendering. It seamlessly integrates with SketchUp, making the transition from modeling to rendering a breeze.
One thing I've always loved about V-Ray is its advanced lighting and material options. You can tweak every little detail, from the intensity of the sun to the texture of a brick. It's like having your own photography studio within your computer.
In a recent project, I had to create a rendering of a modern house at dusk. V-Ray's realistic light simulations allowed me to capture the subtle play of light and shadow, creating an image that felt almost like a photograph. It was a hit with the client!
Limitations
However, V-Ray isn't all sunshine and rainbows. The learning curve can be steep for newcomers. When I first started, I felt a bit overwhelmed by the abundance of settings and options. It took some time to master the software fully.
Another point to consider is the hardware. V-Ray can be a resource hog, especially if you're working on a less powerful machine. Rendering complex scenes can be time-consuming and might even lead to a few frustrating crashes.

https://download.archsupply.com/get/download-lumion-livesync-sketchup/
Lumion and SketchUp: A Dynamic Duo
Strengths
Now, let's talk about Lumion. Imagine you're in a meeting with a client, and they want to see changes in real-time. Lumion is your superhero. It offers lightning-fast real-time rendering, making it perfect for quick design visualizations.
One of Lumion's standout features is its user-friendliness. Even if you're not a 3D guru, you can create impressive renders with minimal training. The user interface is incredibly intuitive, and it won't take long for you to start churning out stunning visuals.
Lumion also boasts a vast library of assets and materials. Need a lush garden with waving trees? Or a realistic water feature? Lumion has you covered. It saves you the time and effort of creating everything from scratch.
In a recent project, my client was adamant about seeing multiple design iterations during our meeting. With Lumion's real-time rendering, I could switch between different lighting conditions, materials, and even landscaping options on the fly. It was a game-changer, allowing us to fine-tune the design in real time.
Limitations
While Lumion is fantastic for quick visualizations, there's a trade-off when it comes to photorealism. Don't expect the same level of detail and realism as V-Ray. In the quest for speed, you might sacrifice a bit of the "wow" factor.
Lumion might also struggle with extremely detailed and complex projects. I once tried to render an intricate heritage building with countless intricate details, and Lumion struggled to maintain its real-time fluidity. It's important to choose the right tool for the job.

https://blog.enscape3d.com/enscape-for-sketchup-2022
Enscape: A SketchUp's Companion
Strengths
Let's switch gears to Enscape. Imagine being able to give your clients an immersive, interactive 3D presentation of your design. Enscape makes it possible. It's all about real-time rendering and even offers virtual reality capabilities.
One of Enscape's biggest strengths is its simplicity. You don't need to be a rendering guru to create engaging, interactive presentations. With a few clicks, you can guide your clients through a 3D model of their future space, making them feel like they're already there.
Enscape integrates seamlessly with SketchUp, so you can easily switch between the two. It's almost like having an extra set of tools within your modeling software.
In a recent project, I had a client who was apprehensive about the design. But with Enscape, I could take them on a virtual tour of the proposed building. They were so impressed with the immersive experience that they gave the project the green light without hesitation.
Limitations
While Enscape is excellent for interactive presentations, it may not offer the same level of photorealism as V-Ray or even Lumion. If your primary focus is creating highly detailed, lifelike renderings, Enscape might not be your top pick.
Additionally, Enscape has its limits when it comes to simulating complex scenes or interactions. If you're working on a project that requires intricate physics simulations or a high degree of detail, you might hit a roadblock.

Choosing the Right Tool for Your Project
So, the big question remains: which one should you choose? The answer depends on your project's specific requirements.
If you're working on a project where photorealism is paramount and you have the patience to master a complex tool, V-Ray is your best bet.
If you need to impress clients quickly with real-time changes and don't want to spend too much time on training, Lumion is a game-changer.
If you want to provide immersive, interactive experiences and are not solely focused on photorealism, Enscape is the way to go.
In many cases, I find myself using a combination of these tools. SketchUp's flexibility allows you to easily switch between rendering software, making it possible to use the right tool for the right task within the same project.
Conclusion
In the world of architectural visualization, the choice of rendering software is crucial. V-Ray, Lumion, and Enscape each have their strengths and limitations, and your decision should be based on the specific needs of your project.
As a 3D artist specializing in architectural visualization, I've come to appreciate the power of these tools and how they can expand the possibilities for your designs. SketchUp is a fantastic starting point, and choosing the right rendering software to pair with it can take your architectural renderings to new heights.
So, take your time, experiment, and, most importantly, consider the unique requirements of your projects. Whether it's V-Ray, Lumion, Enscape, or a combination of these tools, you're well on your way to creating stunning architectural visualizations that will leave clients and colleagues in awe. Happy rendering!

NVLink vs SLI: Choosing the Right Multi-GPU Solution for 3D Architectural Visualization
Discover the ultimate guide for 3D artists choosing between NVLink and SLI for architectural visualization. Explore the benefits, real-world examples, and expert tips in this in-depth comparison. Make the right GPU choice for your projects!

Hey there, fellow 3D artists! If you're diving deep into the world of architectural visualization, you're likely no stranger to the relentless pursuit of the perfect render. And in that quest, having the right tools at your disposal is essential. When it comes to boosting rendering performance, multi-GPU solutions have been a game-changer. In this article, we'll delve into the battle between NVLink and SLI, two technologies that enable you to harness the power of multiple graphics cards for your 3D masterpieces.

The Evolution of Multi-GPU Solutions
A Trip Down Memory Lane
Let's start by taking a trip down memory lane. Back in the day, SLI, or Scalable Link Interface, was the go-to technology for harnessing the power of multiple GPUs. I remember the excitement of setting up my first SLI configuration, thinking I was on the cutting edge of technology. It did boost my rendering speeds, but it had its quirks.
Enter NVLink
Fast forward to today, and NVIDIA has introduced NVLink, a technology that builds upon the foundations laid by SLI. If SLI was a step in the right direction, NVLink is a giant leap. It promises better performance, scalability, and support for modern applications and games.

https://www.guru3d.com/review/geforce-gtx-770-sli-review/page-2/
Understanding SLI (Scalable Link Interface)
What Is SLI?
SLI is all about connecting two or more NVIDIA graphics cards to work together as a unified rendering powerhouse. The concept is pretty straightforward - divide the workload between the GPUs and conquer those rendering times.
Benefits of SLI
SLI did offer significant benefits in its prime. With SLI, I saw a noticeable improvement in rendering speeds, and my architectural visualizations started to come to life quicker. For large, complex projects, SLI was a game-changer.
The Catch
However, SLI had its limitations. Software support was inconsistent, and not all applications or games were optimized for it. I remember the frustration of finding out that my beloved 3D modeling software didn't fully utilize SLI, leaving one of my GPUs twiddling its virtual thumbs.

https://www.nvidia.com/en-us/data-center/nvlink/
Introducing NVLink
The NVLink Advantage
NVIDIA's NVLink was introduced to address the shortcomings of SLI and push multi-GPU technology further. NVLink offers a slew of advantages, and as a 3D artist, it's music to my ears.
Enhanced Bandwidth
One of the standout features of NVLink is the significantly increased bandwidth. The connection between GPUs is lightning fast, which means data can be transferred between them at a much higher rate. This can be a game-changer for large architectural visualization projects that demand tons of data to be shuttled back and forth between GPUs.
Improved Scalability
NVLink also boasts improved scalability. You're not just limited to two GPUs; NVLink supports configurations with more GPUs. This means you can build a rendering powerhouse to tackle the most ambitious projects.
Support for Modern Architectures
NVLink offers better support for modern GPU architectures. With technologies like RTX, ray tracing, and AI-powered rendering, having a rendering solution that can keep up is essential. NVLink is better equipped to handle the demands of these new technologies.

https://linustechtips.com/topic/875595-sli-vs-nvlink-for-quadro/
Benefits and Drawbacks of NVLink and SLI
NVLink vs. SLI: The Showdown
Let's put NVLink and SLI head-to-head.
Benefit #1: NVLink's Bandwidth Boost
NVLink's superior bandwidth is a game-changer, especially for complex architectural visualization. The ability to transfer data between GPUs at high speed is vital for handling large textures, high-polygon models, and intricate lighting calculations. If you're working on a high-profile project with stringent deadlines, this is a clear win for NVLink.
Benefit #2: Enhanced Scalability
Another win for NVLink is its scalability. As a 3D artist, my projects vary in size and complexity, and I appreciate the flexibility of adding more GPUs as needed. For large-scale architectural visualization projects, NVLink's support for more than two GPUs can be a game-changer.
Benefit #3: Software Support
NVLink has better software support in modern applications and games. This was a critical factor for me. I couldn't afford to be limited by software constraints, and NVLink offered the compatibility and optimization I needed.
The Cost Factor
It's not all roses with NVLink, though. One of the potential drawbacks is cost. NVLink-capable GPUs tend to be pricier than their non-NVLink counterparts. When I was considering upgrading to NVLink, I had to weigh the performance benefits against the increased investment.
Compatibility and Setup
Both NVLink and SLI configurations may require motherboard compatibility and the right power supply. Checking compatibility is crucial before making your choice. Setting up a multi-GPU configuration can be a bit of a technical challenge, especially for those new to it. It's not rocket science, but it does require some know-how.
https://irendering.net/should-you-use-nvlink-or-sli-or-multiple-gpus/
Choosing Between NVLink and SLI
Finding the Right Fit
So, which should you choose: NVLink or SLI?
NVLink: When to Choose It
Choose NVLink if:
You're working on large architectural visualization projects with extensive textures, high-polygon models, and complex lighting.
You demand top-tier software support in your 3D applications.
Scalability is essential for your work.
You're not deterred by the higher initial cost.
SLI: Still a Contender
SLI might still be a contender if:
You're on a tight budget and already have compatible GPUs.
Your 3D software doesn't fully support NVLink.
You're dealing with smaller projects and can't justify the investment in NVLink.
My Choice
When I had to make the choice between NVLink and SLI, I opted for NVLink. The rendering performance and software compatibility were too tempting to pass up. Plus, I had my sights set on some massive architectural projects that I knew would push the limits of my GPU setup. NVLink was the right choice for me.

Tips for Optimizing Multi-GPU Setups
Maximizing Your Setup
Whether you choose NVLink or SLI, here are some tips for optimizing your multi-GPU setup.
GPU Pairing
Pairing compatible GPUs can make a big difference in performance. When using NVLink, having identical GPUs is essential for harnessing the full potential of the technology.
System Cooling
Multi-GPU configurations generate more heat, so investing in robust cooling solutions is crucial. Proper airflow and cooling can extend the lifespan of your GPUs and maintain consistent performance.
Software Optimization
Keep your drivers and software up to date. GPU manufacturers release regular driver updates to improve performance and address compatibility issues. Don't neglect these updates.

https://www.vizcom.ai
Future Trends in Multi-GPU Rendering
The Future Beckons
As technology evolves, so does the landscape of multi-GPU rendering for architectural visualization. Let's take a peek into the future.
Ray Tracing Dominance
Ray tracing is becoming more prevalent in architectural visualization. As it gains widespread adoption, the demand for powerful GPUs will increase. NVLink's superior bandwidth could be a significant advantage in handling ray tracing tasks.
AI-Powered Rendering
AI-powered rendering techniques are on the rise, promising to revolutionize the industry. NVIDIA's GPUs, which support AI rendering, will likely play a significant role in this future. If you're planning for the long term, NVLink might be a more future-proof choice.
Conclusion
In the world of 3D architectural visualization, the right choice between NVLink and SLI can make a world of difference. It all boils down to your specific needs, budget, and the scale of your projects.
If you're diving into extensive, high-end architectural visualization projects with the need for top-notch software support, scalability, and aren't deterred by the cost, NVLink might be your golden ticket.
On the other hand, if you're working on smaller projects or need to stick to a budget, SLI might still serve you well. It's a matter of finding the right fit for your unique needs.
Remember, technology is always advancing, and the tools we use today may not be the same as those we use tomorrow. Stay informed, keep an eye on emerging technologies, and be prepared to adapt to the ever-changing landscape of 3D architectural visualization. Happy rendering, my fellow artists!

General Skills Needed to Be a Successful 3D Artist: Insights from an Architectural Visualization Specialist
Discover the essential general skills every 3D artist needs for success, from time management to networking. Learn from an experienced architectural visualization specialist in this in-depth guide.

Hey there, aspiring 3D artists! If you've ever wondered what it takes to thrive in the exciting yet demanding world of 3D art, you've come to the right place. As someone who has spent years specializing in 3D architectural visualization renders, I'm here to share the general skills that can make or break your journey as a 3D artist.
Introduction
The life of a 3D artist is a fascinating mix of creativity, technical skills, and the ability to adapt to an ever-evolving landscape. Whether you're creating architectural renderings, character designs, or game environments, certain general skills are essential to your success. Let's dive into these skills, with some real-world anecdotes to make the journey more relatable.

https://www.ismartrecruit.com/blog-5-effective-time-management-strategies-for-recruiters
Time Management: The Clock is Your Canvas
When you embark on a project, time becomes your most valuable resource. It's not just about juggling software and polygons; it's about managing your time efficiently.
H2: Discussing Time Management
In the early days of my career, I often found myself caught in a time crunch, racing to meet project deadlines. I realized that my 3D art skills could only shine when I managed my time wisely.
H3: Tips for Effective Time Management
Creating Schedules and Setting Deadlines: Treat your projects like appointments. Set specific times to work on them and stick to them. This structure allows you to organize your tasks and keep procrastination at bay.
Prioritizing Tasks: Identify the most critical aspects of your project and tackle them first. As a 3D artist, this could mean focusing on high-poly models before moving on to textures and lighting.
Time Tracking Techniques: Use time tracking apps or simple timers to monitor how long you spend on each task. It's an eye-opener and helps you fine-tune your time management skills.

https://lattice.com/library/how-to-create-a-culture-that-encourages-communicati
Communication and Collaboration: Creating Art is a Team Sport
3D art is often a collaborative effort, especially in architectural visualization, where you work with architects, designers, and clients.
H2: Discussing Communication and Collaboration
Early in my career, I struggled with translating technical jargon into layman's terms for clients. Effective communication and collaboration are vital skills for turning creative visions into reality.
H3: Working with Architects, Designers, and Clients
Artists who can bridge the gap between creative and technical worlds are highly sought after. Take the time to understand your client's needs and convey your ideas clearly.
H3: Handling Feedback and Revisions
Not all feedback will be glowing praise. Learn to embrace constructive criticism and iterate on your work. It's how you grow as an artist and deliver a product that exceeds expectations.

Problem-Solving and Adaptability: The Constant Artistic Challenge
Every 3D project presents unique challenges. Your ability to adapt and problem-solve will set you apart.
H2: Discussing Problem-Solving and Adaptability
One of my most memorable projects involved creating a highly detailed cityscape within a tight timeframe. I had to adapt and find creative solutions to meet the deadline without compromising quality.
H3: Dealing with Software Updates and Changes
3D software evolves rapidly. Keep learning and stay updated with the latest tools to remain competitive. Sometimes, software updates can throw a wrench in your workflow, but adaptability is the key to success.
H3: Solving Technical and Creative Challenges
Embrace the challenges of creating intricate 3D models, intricate lighting setups, or complex animations. Each hurdle you overcome adds to your expertise.
https://www.indeed.com/career-advice/resumes-cover-letters/detail-oriented
Attention to Detail: Where Beauty Lies in the Pixels
As a 3D artist, every pixel counts. Your work is only as good as the smallest detail.
H2: Discussing Attention to Detail
An early project of mine involved creating a lifelike interior. It was the meticulous attention to detail, from the texture of the wood floors to the sheen on the vases, that brought the scene to life.
H3: Close Observation and Reference Materials
Study real-world objects and environments. This hands-on research will help you replicate the fine details that make your creations realistic.
H3: Regular Quality Checks
Don't rush through your work. Regularly step back and assess your project. Pay attention to the details you might have overlooked.

https://www.2gs.co/about
Organization: The Foundation of Your Workflow
An organized workspace and workflow are the unsung heroes of 3D art.
H2: Discussing Organization
At the beginning of my career, I often struggled with messy project files. It led to confusion and wasted time. Organization became a crucial skill.
H3: File Management and Naming Conventions
Develop a consistent file naming system and folder structure. It may seem mundane, but it can save you hours of frustration.
H3: Utilizing Project Management Tools
Consider using project management software to keep track of your tasks and deadlines. Tools like Trello or Asana can help streamline your workflow.
Stress Management: The Art of Staying Zen
The world of 3D art can be stressful, especially when juggling multiple projects. Stress management is more than just a soft skill; it's a survival skill.
H2: Discussing Stress Management
During a particularly demanding project, I found myself burning the midnight oil, and the stress began to take its toll. I realized that I needed a more balanced approach.
H3: Work-Life Balance
Set boundaries for work and personal life. It's easy to get absorbed in your projects, but remember that a well-rested artist is a more creative artist.
H3: Meditation and Relaxation Techniques
Experiment with relaxation techniques like meditation or deep breathing exercises. They can help you stay centered and calm when deadlines are looming.

https://www.2gs.co/ourworks
Networking and Building a Portfolio: It's Not Just About Your Art
To succeed as a 3D artist, you need to get your work in front of the right people and continuously grow your skills.
H2: Discussing Networking and Building a Portfolio
One of my breakthroughs came when I started sharing my work on social media and engaging with online communities. Networking can open doors you never thought possible.
H3: Showcasing a Diverse Range of Work
Your portfolio should represent your versatility as an artist. Include a variety of projects to demonstrate your skills and range.
H3: Participating in Online Communities and Industry Events
Engage with online forums, art communities, and attend industry events. Networking provides opportunities for collaboration, mentorship, and valuable feedback.
Continuous Learning: The Art World Never Stops Evolving
As a 3D artist, your learning journey is never-ending. Staying updated with industry trends and tools is vital.
H2: Discussing Continuous Learning
I once faced a project that demanded a specific software I hadn't used before. The pressure was on to learn it quickly.
H3: Online Courses and Tutorials
Online courses and tutorials can be your lifeline when you need to acquire new skills rapidly. Websites like Udemy and Coursera offer courses on various aspects of 3D art.
H3: Attending Workshops and Conferences
Consider attending workshops, seminars, and conferences to stay in touch with the industry's latest developments. It's also a fantastic opportunity to network.

https://www.2gs.co/ourworks/thetamora
Conclusion
Becoming a successful 3D artist isn't just about mastering software; it's about mastering yourself. The journey may be challenging, but the rewards are endless. With strong time management, communication, and adaptability skills, an unyielding attention to detail, and a focus on personal well-being, you can thrive in the dynamic world of 3D art. Remember, every rendering, every model, and every animation you create is a testament to your skill, dedication, and passion. So, embrace the journey, and let your imagination run wild in the three-dimensional world.

Real Estate Developer Marketing: 7 Tips to Attract Clients and Boost Sales
Unlock the secrets to real estate success! Discover 7 expert tips, from 3D visualization to client relationships, in our guide for real estate developers. Boost sales and attract clients like never before.

Hey there, fellow real estate developers! If you're like me, you know that the world of real estate can be both exciting and challenging. It's all about finding the perfect property, envisioning its potential, and then convincing others to see it your way. That's where marketing comes in, and as a 3D artist who specializes in creating architectural visualizations, I've learned a thing or two about attracting clients and boosting sales in this competitive industry.
So, if you're looking for tips on how to make your real estate development business stand out, keep reading. In this article, we'll dive into seven practical strategies to help you attract more clients and increase your sales. From the magic of 3D visualization to fostering strong client relationships, we've got you covered.

Tip 1: Invest in High-Quality 3D Architectural Visualization
Seeing is Believing
When it comes to real estate, seeing truly is believing. One of the most powerful tools in your marketing arsenal is high-quality 3D architectural visualization. As a 3D artist, I've witnessed firsthand how this technology can transform a real estate project from a concept to a captivating, photorealistic representation.
Personal Anecdote: I once worked on a project where we transformed a vacant lot into a stunning residential development using 3D visualization. Potential buyers were blown away by the lifelike renderings, and sales skyrocketed. It's all about giving your clients a glimpse into the future, and 3D visualization does just that.
But how do you go about it?
Choose the Right 3D Artist or Agency: Look for professionals who specialize in architectural visualization. Check their portfolio and ask for references. A skilled artist can turn your ideas into stunning visuals that resonate with your target audience.
Tip 2: Create Stunning Virtual Tours
Step Inside the Property
In the digital age, virtual tours have become a game-changer for real estate developers. These immersive experiences allow potential clients to step inside a property without leaving their homes. It's like having an open house 24/7, and it's incredibly effective.
Personal Anecdote: Recently, I collaborated on a project that included a virtual tour. Prospective buyers could explore every nook and cranny of the property from the comfort of their laptops. The response was overwhelming, with many clients expressing how the virtual tour was the deciding factor in their purchase.
So, how can you leverage virtual tours?
Embrace the Technology: Invest in 360-degree cameras and software that can create interactive virtual tours. You'll not only engage your audience but also stand out from the competition.

https://www.2gs.co/
Tip 3: Optimize Your Website and Online Presence
Your Online Storefront
In today's digital landscape, your website is often the first point of contact between you and potential clients. It's your online storefront, and it needs to make a great first impression.
Personal Anecdote: Early in my career, I worked on a project with a developer who had a sleek and informative website. It wasn't just about aesthetics; it was user-friendly and loaded with valuable content. This made a significant impact on how clients perceived the developer's professionalism.
Here's what you should consider:
Professional Website Design: Invest in a professional web designer to create a visually appealing and easy-to-navigate website. Ensure that it's responsive and loads quickly on all devices.
SEO Strategies: Optimize your website for search engines (SEO). Use relevant keywords and regularly update your content to rank higher on search results. This is vital for attracting organic traffic.
Leverage Social Media: Maintain an active presence on social media platforms like Instagram, Facebook, and LinkedIn. Share your projects, engage with your audience, and create a sense of community.

https://www.2gs.co/about
Tip 4: Develop a Compelling Brand Story
Building Emotional Connections
People don't just buy properties; they buy into a lifestyle and a vision. That's where your brand story comes in. It's about creating an emotional connection with your clients.
Personal Anecdote: I once collaborated with a developer who had a powerful brand story. They didn't just sell houses; they sold the idea of a better life, of creating cherished memories in a dream home. It resonated deeply with their clients, and they enjoyed strong brand loyalty.
Here's how to craft your brand story:
Unique Brand Identity: Define what sets you apart from the competition. Is it your commitment to sustainability, your design philosophy, or your community involvement? Highlight it in your brand story.
Visual and Content Alignment: Ensure that your visuals, such as your 3D renderings and virtual tours, align with your brand story. Consistency is key to building a strong brand image.

Tip 5: Utilize Content Marketing
nform and Inspire
Content marketing is a powerful tool to establish your authority in the real estate industry and keep your audience engaged. Share valuable information, insights, and inspiration.
Personal Anecdote: I've seen how a well-maintained blog can work wonders. By providing expert advice, project updates, and showcasing your expertise, you not only attract potential clients but also build trust and credibility.
Here's how to do it:
Blogging: Start a blog on your website where you share industry trends, project updates, and tips for buyers and investors.
Video Marketing: Create engaging videos that showcase your properties, share client testimonials, and provide informative content.
Tip 6: Engage in Local Marketing
Target Your Local Audience
While the digital world is essential, don't forget about your local market. Local marketing strategies can help you connect with potential clients in your area.
Personal Anecdote: I once collaborated with a developer who organized neighborhood events and workshops. These initiatives not only increased their visibility but also built strong community ties, leading to more referrals.
Here are some local marketing ideas:
Community Involvement: Participate in local events, sponsor community activities, and engage with local charities. It shows that you're invested in the area.
Partnerships: Collaborate with local businesses, real estate agents, and influencers to expand your reach.

Tip 7: Foster Client Relationships and Referrals
Clients for Life
Building strong client relationships is not just about making a sale; it's about creating clients for life. Happy clients become your best advocates.
Personal Anecdote: I once worked on a project where the developer went above and beyond to ensure the client's satisfaction. As a result, that client referred several friends and family members, leading to a steady stream of business.
Here's how to foster client relationships:
Exceptional Customer Service: Always prioritize your clients' needs and concerns. Address them promptly and professionally.
Referral Programs: Encourage satisfied clients to refer others to your services. You can offer incentives or discounts as a token of appreciation.

Conclusion
In the world of real estate development, effective marketing is the key to success. Whether it's through stunning 3D architectural visualization, immersive virtual tours, or compelling brand stories, you have the tools to attract clients and boost sales.
Remember, it's not just about selling properties; it's about selling a dream and a lifestyle. By investing in your online presence, crafting a unique brand story, and nurturing client relationships, you'll not only attract more clients but also create a lasting legacy in the real estate industry.
So, go out there and make your mark in the world of real estate development. With these seven tips in your toolkit, you're well on your way to success.
Did our blog answer your questions? We have a free ebook available on our home page just one click away from you!

https://www.2gs.co/
Interior Design vs. Interior Styling: When to Choose Which for Your Space
Discover the art of interior design vs. interior styling! Uncover when to choose each for your space transformation. Expert insights and real-life anecdotes await in this guide.

Hey there, fellow interior enthusiasts! Whether you're moving into a new home or just looking to give your current space a fresh vibe, it's crucial to understand the differences between interior design and interior styling. As an experienced interior stylist who specializes in creating stunning 3D renders, I'm here to guide you through the world of interior transformations and help you figure out when to opt for interior design or interior styling. Let's dive in!
Defining Interior Design
First things first, let's get the basics down.
What Is Interior Design?
Interior design is like the architectural backbone of your space. It's about much more than choosing the right paint color or throw pillows; it's about the thoughtful arrangement of spaces, creating functional layouts, and ensuring a cohesive and harmonious overall design. Interior designers often work hand in hand with architects, builders, and contractors to bring structural changes and long-term planning into play.
One of the key things to note about interior design is that it typically requires formal education and certifications. Think of it as the heavyweight champion of the design world, with a focus on optimizing spaces for both aesthetics and functionality.
Defining Interior Styling
Now, let's switch gears and talk about the creative side of things.
What Is Interior Styling?
Interior styling is all about the aesthetics, the icing on the cake. It involves adding the final touches to a space to make it visually appealing and feel like home. Interior stylists use furniture, decor, accessories, and art to breathe life into a room. It's about creating atmospheres and showcasing your personality through design.
Unlike interior design, interior styling doesn't typically require formal education or certifications. It's a more flexible and creative aspect of interior transformation, perfect for those who want to enhance their living spaces without major structural changes.

Key Differences Between Interior Design and Interior Styling
Let's break down the fundamental distinctions between these two design realms.
Core Focus
Interior Design: Functionality comes first. Interior designers focus on optimizing the use of space, ensuring it functions efficiently for the intended purposes. It's about creating a floor plan that works seamlessly.
Interior Styling: Aesthetics take the front seat. Interior stylists enhance existing spaces through decor, furniture, and accessories. It's all about creating visual appeal and atmosphere.
Education and Professional Requirements
Interior Design: Typically, interior designers have formal education, certifications, and may be licensed. They are trained to handle complex spatial planning and structural changes.
Interior Styling: Interior stylists often have a creative background, but they don't necessarily require formal education. It's more about an eye for design and a passion for aesthetics.
Project Timelines and Budgets
Interior Design: Design projects can be extensive, requiring more time and a larger budget, especially if structural changes are involved. Think of it as a long-term commitment.
Interior Styling: Styling projects are often quicker and more budget-friendly. They provide a fantastic option for those seeking a room refresh without breaking the bank.
Collaboration with Other Professionals
Interior Design: Interior designers often collaborate closely with architects, contractors, and builders to bring structural changes to life.
Interior Styling: Interior stylists are more likely to work independently or alongside decorators, focusing on the finishing touches.
When to Choose Interior Design
So, when should you consider bringing in an interior designer?
Major Renovations or New Construction
If you're embarking on a major overhaul, such as building a new home or completely renovating an existing one, interior design is the way to go. Interior designers can help you optimize space, create layouts, and ensure everything aligns with building codes and regulations.
Spatial Reconfiguration and Layout Changes
When you need to move walls, create open-concept spaces, or make structural changes, an interior designer is essential. They'll help you envision the possibilities and make those changes come to life.
Creating a Cohesive Design Concept
For projects where you want a unified design concept throughout your space, an interior designer is your best ally. They'll help you select materials, finishes, and furnishings that seamlessly tie everything together.
Compliance with Regulations
If your project involves legal requirements, like adhering to building codes and permits, an interior designer's expertise in navigating these matters is invaluable.
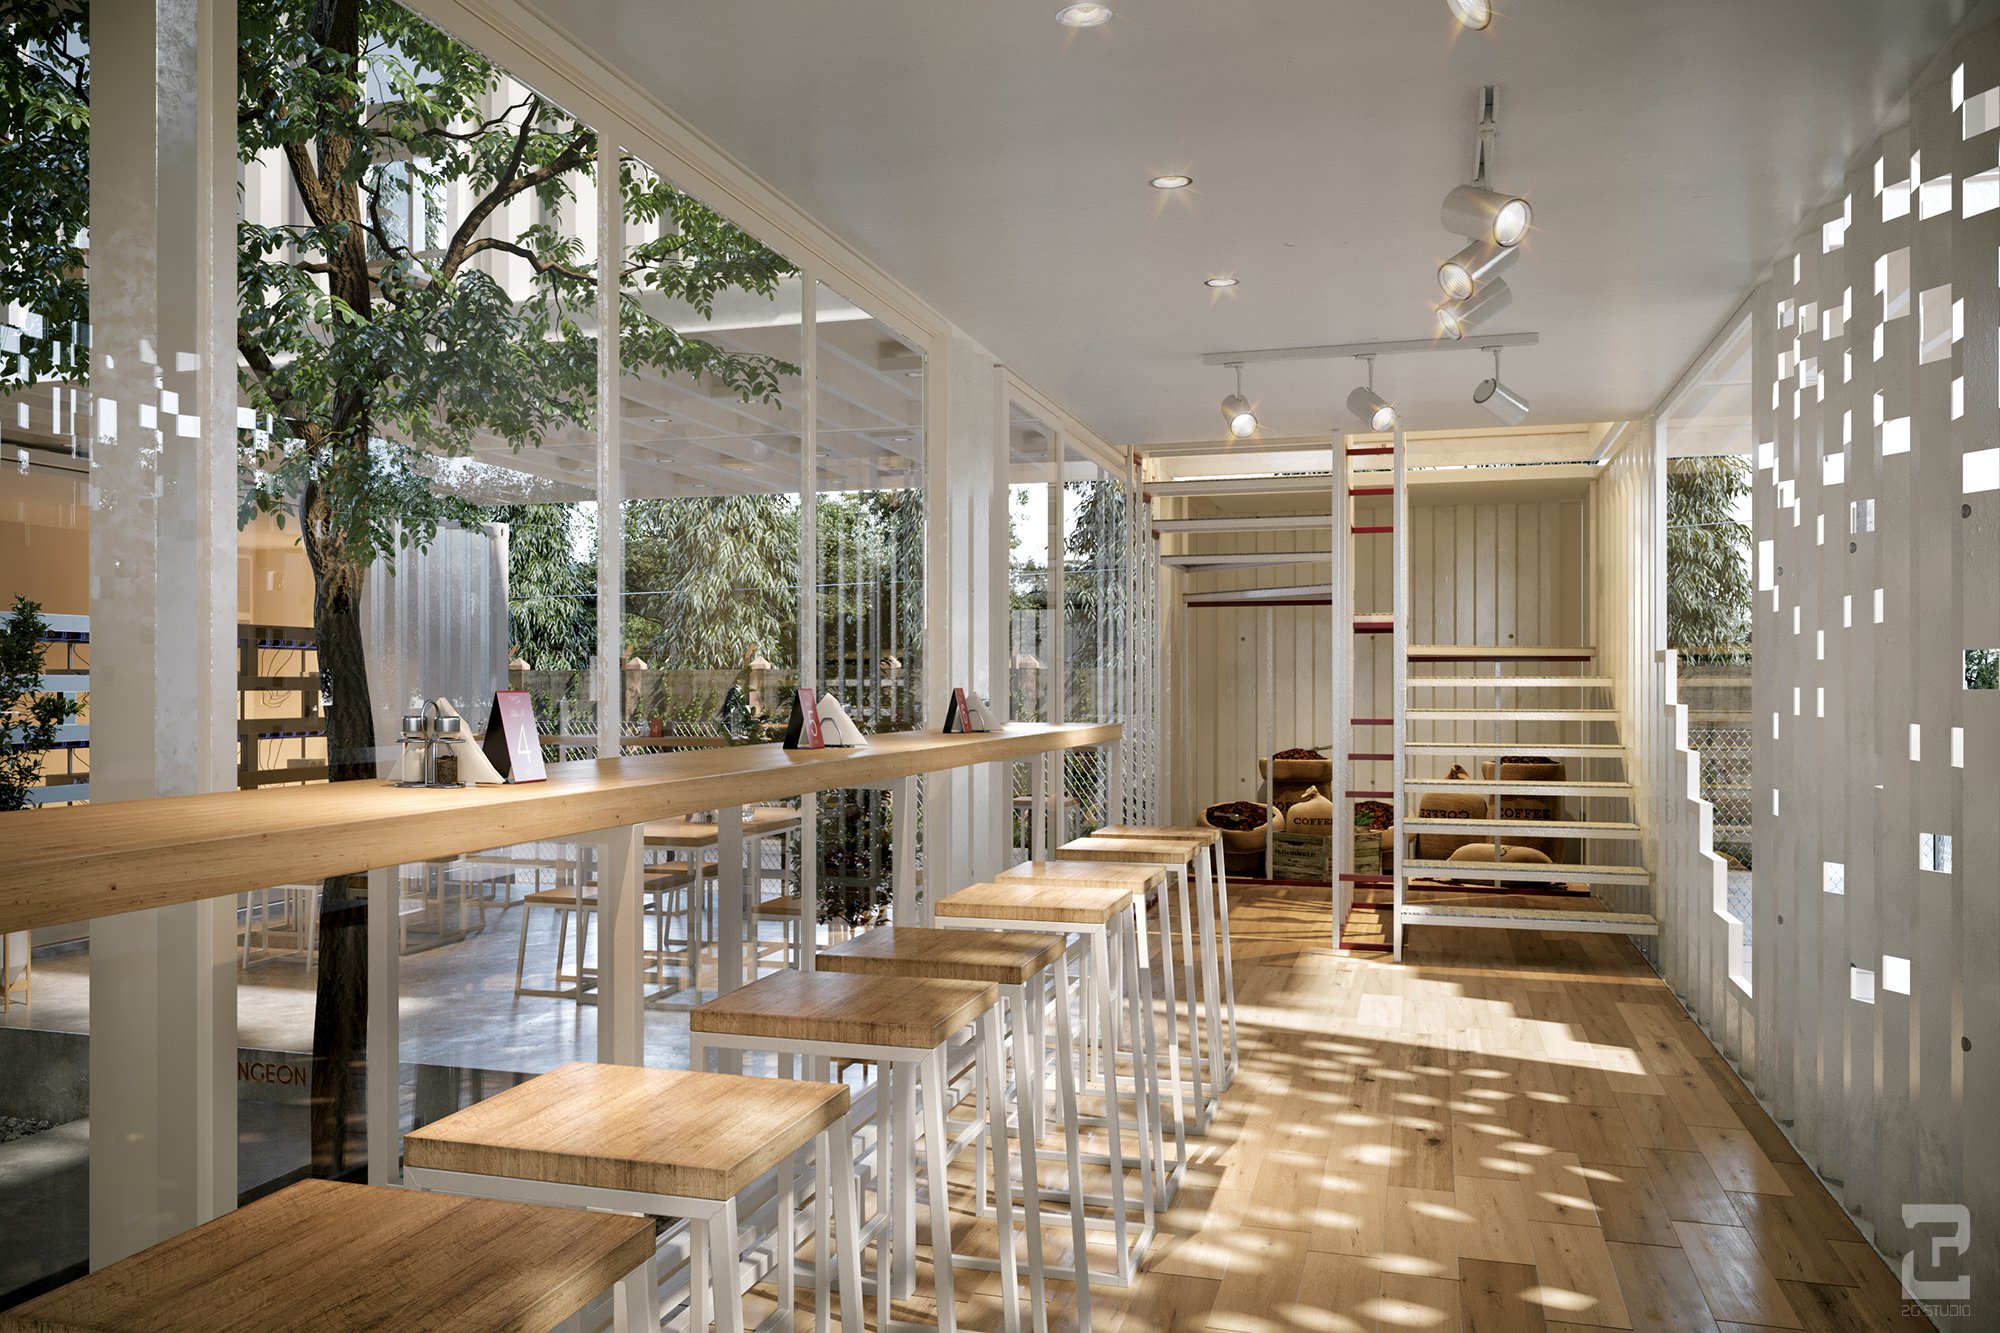
When to Choose Interior Styling
Now, let's talk about when interior styling is the perfect fit for your needs.
Existing Spaces in Need of a Refresh
If you have a space that's perfectly functional but lacks that "wow" factor, interior styling can work wonders. It's the equivalent of giving your room a stylish makeover.
Limited Budgets or Time Constraints
Interior styling is often more budget-friendly and quicker than a full interior design project. If you're working with limited resources or need results in a shorter time frame, it's a fantastic option.
Personalizing or Enhancing Aesthetics
Interior styling lets you put your stamp on your space. It's perfect for adding your personality to your surroundings through carefully chosen decor and accessories.
Fine-Tuning and Adding Finishing Touches
When you love your space but feel it's missing that special something, an interior stylist can help you put the finishing touches in place to elevate the overall design.
The Synergy Between Interior Design and Interior Styling
Believe it or not, these two disciplines can work hand in hand to create amazing results.
Collaboration for the Win
Interior designers and interior stylists can collaborate to achieve the perfect balance of functionality and aesthetics. While the designer focuses on the structural elements, the stylist can add the final touches that make the space truly unique.
My Experience
I've been lucky to work on projects where interior designers and stylists joined forces. The designer laid the groundwork, optimizing the spaces and ensuring everything was up to code. Then, I came in with my styling expertise to add character, charm, and personal flair to the space. The result? A stunning and functional interior that truly wowed our clients.
Conclusion
In the world of interior transformations, knowing when to choose interior design or interior styling is key. It's not about one being better than the other; it's about finding the right fit for your project's needs. So, whether you're dreaming of a major renovation or just looking to spruce up your living room, make an informed choice, and don't hesitate to seek professional help when needed. Your dream space is closer than you think!
Additional Resources
Looking for more inspiration and guidance? Here are some resources to help you on your interior design and styling journey
We have a free interior styling guide available a click away from you.
Remember, the world of design is an exciting one, and it's all about making your space uniquely yours. Happy decorating!

What are the Benefits of Using NVLink for 3D Rendering?
Elevate your architectural 3D rendering game with NVLink technology! Explore faster rendering, efficient workflows, and cost-effective performance enhancements in this in-depth guide.
https://www.pugetsystems.com/labs/articles/unsupported-how-to-make-dual-nvlink-work-on-windows-10-1688/
Hey there, fellow 3D artists and architectural visualization enthusiasts! If you're like me, you understand the magic that happens when you turn your architectural designs into stunning 3D renders. Creating immersive visualizations that bring spaces to life is both an art and a science, and it demands a lot from our hardware. That's where NVLink comes into play.
In this article, I'm going to share my experiences as a 3D artist, specializing in architectural visualization, and explain why you should seriously consider harnessing the power of NVLink for your 3D rendering endeavors.
https://www.nvidia.com/en-us/data-center/nvlink/
Understanding NVLink
Before we dive into the benefits, let's get a handle on what NVLink is and why it matters. NVLink is a high-speed interconnect technology developed by NVIDIA, designed to connect multiple GPUs (Graphics Processing Units) together in a way that allows them to work as one cohesive unit. It's like combining the strengths of multiple talented artists to create a masterpiece.
NVLink vs. Previous GPU Connection Technologies
Now, you might wonder, "Isn't this just like SLI?" Well, yes and no. NVLink is the evolution of SLI (Scalable Link Interface), but it's more versatile and efficient. It's not just about gaming; NVLink opens up exciting possibilities for 3D rendering and other professional applications.
It's Not Just for Gamers
Let's clear up a misconception right away: NVLink is not exclusive to gamers. As 3D artists, we're in the same boat as gamers when it comes to demanding graphics tasks. NVLink can be a game-changer for us too, pun intended.
Unleashing the Power of Multiple GPUs
Alright, let's get to the juicy part – how NVLink turbocharges your 3D rendering.
Increased Rendering Speed
Picture this: You've spent hours crafting a highly detailed architectural model, and now it's time to render it. With NVLink, the rendering process becomes lightning-fast. Multiple GPUs work in harmony, dividing the rendering workload, and delivering results that would make your single-GPU setup look sluggish.
Handling Larger Scene Complexities
Architectural projects often involve intricate details, from intricate facades to lush interior decor. When you're working with high-resolution textures, complex lighting scenarios, and a plethora of 3D assets, the scene complexity can be overwhelming. NVLink's power allows you to tackle massive projects with ease, maintaining smooth performance even when your scene pushes the boundaries.
Real-time Interactivity
One of the joys of architectural visualization is the ability to interact with your design in real-time. You want to explore your 3D environment as if you were there. NVLink facilitates this by ensuring that your real-time previews are smooth and responsive. This is especially important when presenting your work to clients who want to experience the space before it's built.
Faster Iterations
Now, here's a personal anecdote. I once worked on a project where the client requested several design iterations within a tight deadline. With NVLink, I could render different design options simultaneously, significantly speeding up the process. This allowed us to meet the client's needs and explore various design directions efficiently.

Scaling Performance for Large Projects
Architects and designers often dream big, and that means big projects. Imagine you're working on a sprawling master plan for a new development, complete with multiple buildings, landscapes, and intricate details. Your standard single-GPU setup might struggle, but with NVLink, you can effortlessly scale your rendering power. Adding more GPUs means your hardware can keep up with your grand visions.

Improved Workflow Efficiency
In the fast-paced world of architectural visualization, time is precious. NVLink contributes to a more efficient workflow in several ways:
Faster Asset Loading
When you're dealing with vast textures and complex 3D models, loading times can become a bottleneck. NVLink's high bandwidth ensures that textures and geometry load in the blink of an eye. No more twiddling your thumbs while waiting for assets to load.
Simultaneous Tasks
3D rendering often involves more than just rendering. You might be modeling, texturing, and post-processing simultaneously. NVLink allows you to run multiple tasks or rendering processes in the background without slowing down your primary rendering job. It's like having a multitasking superpower.
Multitasking Capability
Here's another personal story. I frequently find myself working on architectural animations while also rendering high-resolution images. NVLink makes this a breeze. I can render frames of the animation while continuing to tweak the scene and camera angles. The result? A significant time saver and a smoother workflow.
Cost-Efficiency and Future-Proofing
Now, let's talk about the practical side of things—budgets and planning for the future.
Cost Considerations
Yes, setting up an NVLink configuration might seem like a significant investment. However, when you weigh the performance benefits against the cost of a single, ultra-high-end GPU, the value becomes apparent. You get more rendering power for your money, and it's a versatile investment that will serve you well across various projects.
Potential for Future Optimizations
Technology never stops evolving. NVLink's potential isn't limited to its current capabilities. As software developers catch up and optimize their applications for multi-GPU setups, your investment in NVLink becomes even more valuable. It's like future-proofing your rendering rig.
https://www.legitreviews.com/nvidia-geforce-rtx-2080-ti-sli-review-with-nvlink_208222
Compatibility and Setup
Considering NVLink? Here are some practical tips on getting started.
Compatible GPUs and Motherboards
Before diving in, make sure your GPUs support NVLink. Check NVIDIA's official website for a list of compatible GPUs. Additionally, ensure your motherboard is NVLink-capable. Not all motherboards support this technology, so double-check the specifications.
Driver and Software Requirements
Keeping your GPU drivers up-to-date is crucial for optimal performance. Visit NVIDIA's website regularly to download the latest drivers. Also, make sure your rendering software is compatible with NVLink setups. Software updates often include optimizations for multi-GPU configurations.
Configuration Tips
Configuring NVLink for 3D rendering is typically straightforward. Follow the manufacturer's guidelines for installing the NVLink bridge connector between your GPUs. Once that's done, ensure that NVLink is enabled in your system's BIOS settings. Your system should recognize the connected GPUs, and you'll be ready to harness their combined power.
Real-World Examples
To drive home the benefits of NVLink, let me share a few real-world examples from my own experiences.
The Large-Scale Residential Complex
I once had the opportunity to work on a project involving a vast residential complex. The client needed realistic visualizations for marketing purposes. With NVLink, I could handle the enormous scene without sacrificing rendering quality or speed. The ability to explore every nook and cranny of the complex in real-time was a game-changer during client presentations.
The Tight-Deadline Office Renovation
Another project had me revamping an office space on a tight schedule. The client wanted multiple design options to choose from. NVLink allowed me to render different design iterations simultaneously, saving me precious time. I could also make on-the-fly adjustments during client meetings, impressing them with the flexibility of the design process.

Conclusion
In the world of 3D rendering for architectural visualization, every detail matters. NVLink isn't just another tech buzzword; it's a tool that can elevate your craft to new heights. Whether you're handling massive architectural projects or need to meet tight deadlines with multiple design iterations, NVLink's benefits are undeniable.
As 3D artists, we constantly push the boundaries of what's possible. NVLink ensures that our hardware keeps up with our creative ambitions. While it may require some initial investment and setup, the efficiency, speed, and scalability it offers are well worth it.
Remember, the world of technology never stands still. As software developers continue to optimize for NVLink setups, your investment will pay off even more in the future. So, if you're serious about 3D rendering for architectural visualization, consider NVLink—it's the bridge to a world of limitless possibilities in your rendering journey.

https://www.2gs.co/blog-section/y0tb6rrryieqb5m32rwu6p12foznk1
Still interested in NVlink? Check on our take on “Understanding NVLink and its Software Compatibility: Can NVLink be Used on Chaos Vantage?” which is one click away!

V-RAY, BLENDER, OCTANE | NVLink-Compatible 3D Rendering Software
Discover the ultimate guide to 3D rendering software with NVLink support! Unleash the power of NVIDIA GPUs and NVLink technology for breathtaking architectural visualization. Dive into personal anecdotes and expert insights to supercharge your renders.

https://www.nvidia.com/en-us/data-center/nvlink/
Hey there fellow 3D enthusiasts! If you're anything like me, you're constantly on the lookout for ways to take your architectural visualization renders to the next level. One thing that can make a significant difference in rendering performance is NVLink technology. In this article, we'll explore 3D rendering software that supports NVLink, and I'll even throw in a few personal anecdotes along the way.
Understanding NVLink
Before we dive into the software options, let's get a handle on what NVLink is and why it matters. NVLink is a technology developed by NVIDIA that allows you to connect multiple GPUs (Graphics Processing Units) in your system. It's like having a turbocharger for your rendering engine.
The NVLink Boost
Think of NVLink as the secret sauce that makes your GPUs work together seamlessly. When I first heard about NVLink, I was skeptical, but after upgrading my rig and experiencing the boost in rendering speed, I was hooked. The ability to harness the power of multiple GPUs is a game-changer for architectural visualization.
Software Compatibility Clarified
Here's the catch: NVLink doesn't directly affect software compatibility. Instead, it's all about your GPU. Most 3D rendering software can benefit from NVLink if they support NVIDIA GPUs, and that's what we're here to explore.
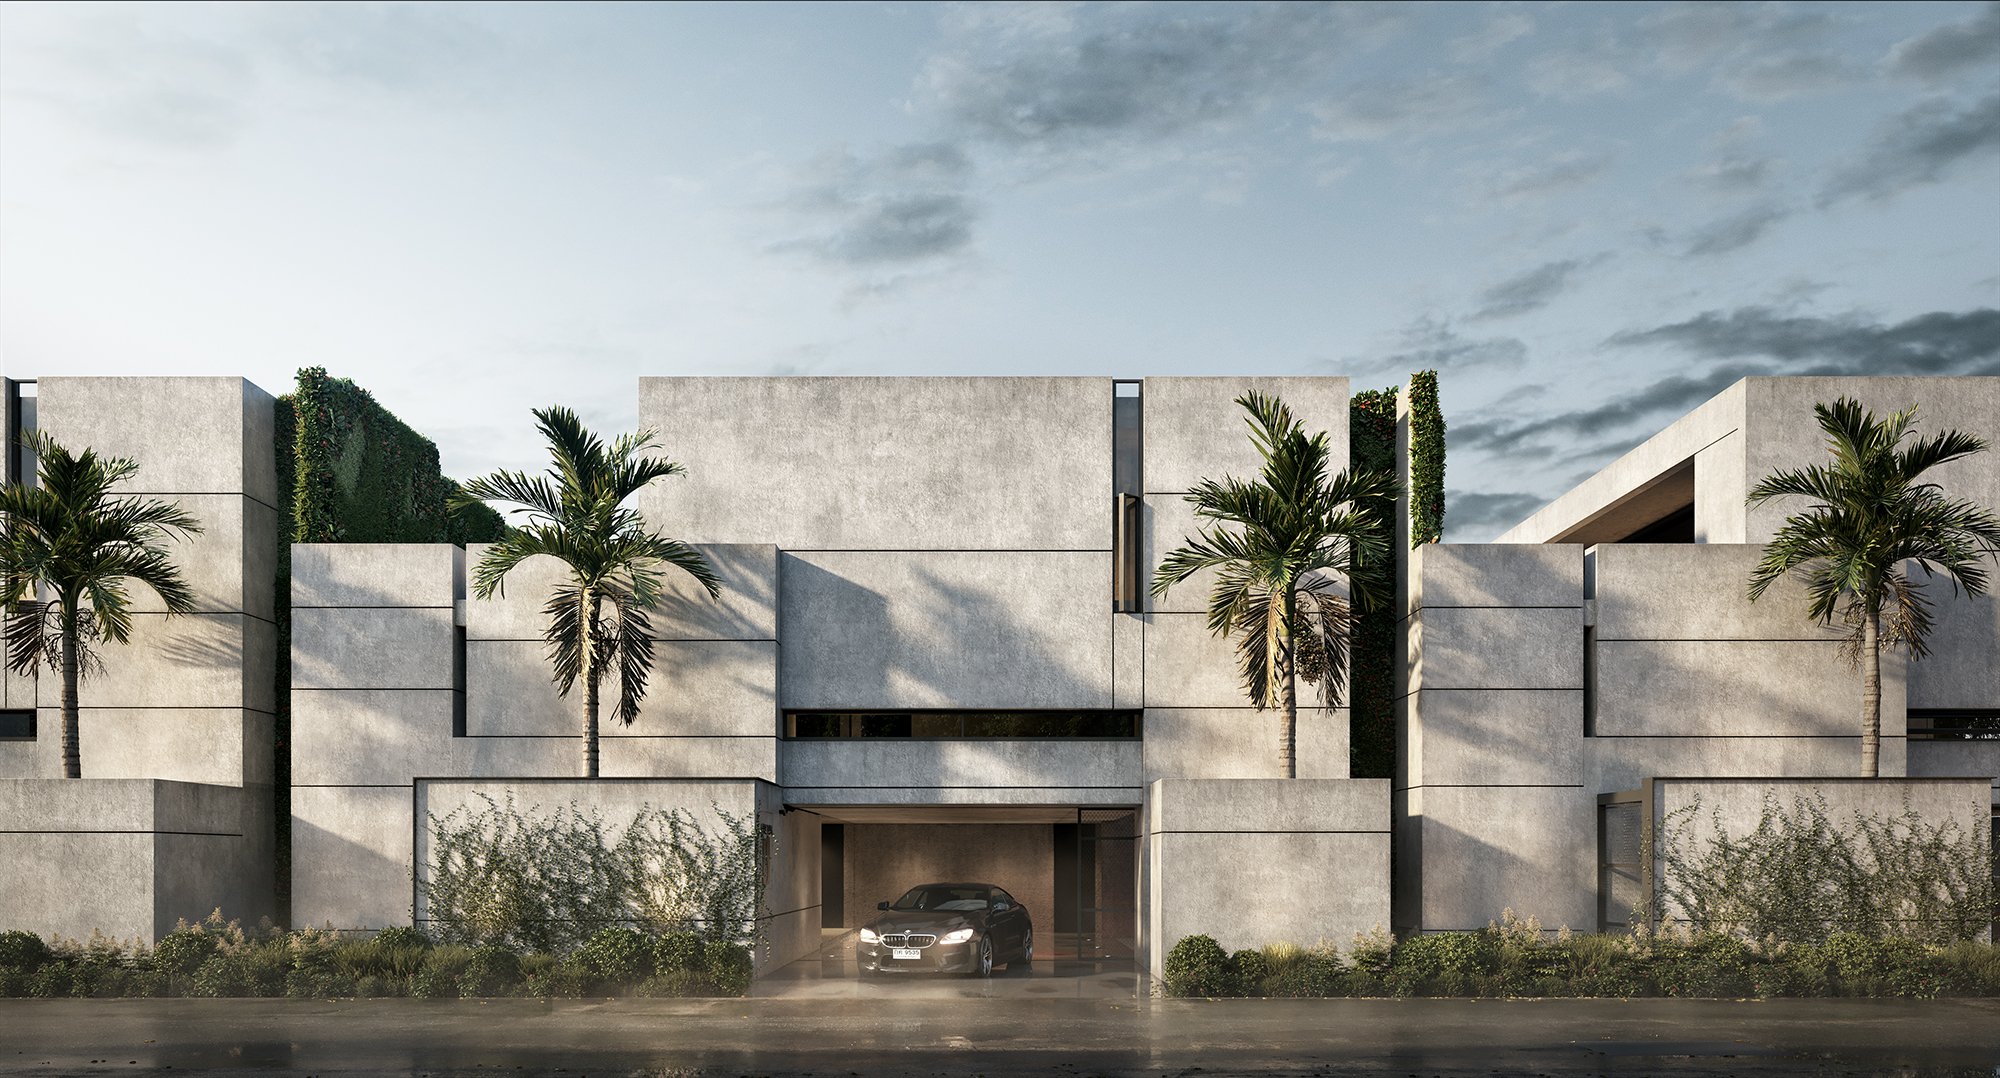
Software Options for Architectural Visualization
Alright, let's get to the good stuff. These are the software options that not only play nice with NVIDIA GPUs but can also utilize NVLink for that extra oomph in your architectural renders.

https://www.autodesk.com/products/maya/free-trial
Autodesk Maya
Maya and NVLink: A Match Made in 3D Heaven
I've been using Maya for years, and its compatibility with NVIDIA GPUs is rock-solid. When it comes to architectural visualization, Maya offers a plethora of tools and plugins that can help you create stunning renders. Now, pair that with NVLink, and you've got yourself a rendering powerhouse.

https://www.blender.org/
Blender
Blender: Free and NVLink-Friendly
Blender has come a long way, and it's now one of the most versatile 3D modeling and rendering tools out there. It plays nicely with NVIDIA GPUs and can utilize NVLink for rendering tasks. Plus, it's free! You can't beat that, especially if you're just starting in the 3D rendering world.

https://www.maxon.net/en/cinema-4d
Cinema 4D
Cinema 4D: Sleek Design Meets GPU Power
Cinema 4D is known for its sleek interface and user-friendly design. It also happens to be compatible with NVIDIA GPUs, making it a fantastic choice for architectural visualization. With the added boost from NVLink, your renders will be smoother and faster than ever.

https://www.chaos.com/all-products#vray
V-Ray
V-Ray: Where Quality Meets NVLink
V-Ray is renowned for its rendering quality, and it plays exceptionally well with NVIDIA hardware. When I switched to V-Ray for architectural renders and coupled it with NVLink, I saw a significant improvement in both speed and quality. It's a winning combination.
Specialized Rendering Engines
Now, let's talk about some specialized rendering engines that can take your architectural visualization to the next level with NVLink.
Redshift
Redshift: The Speed Demon
Redshift is a GPU-accelerated renderer that's well-known for its speed. It's also fully compatible with NVIDIA GPUs and can utilize NVLink to supercharge your renders. I remember a project where a tight deadline was looming, and Redshift's speed, coupled with NVLink, saved the day.

Octane Render
Octane Render: Lightning in a Bottle
Octane Render is another GPU-based powerhouse that's perfect for architectural visualization. It's got a reputation for its speed and photorealistic results. When I decided to give Octane a shot and paired it with NVLink, my renders felt like they were on steroids.
Arnold
Arnold: The Photorealistic Champion
Arnold is known for its stunningly realistic renders, and it's fully compatible with NVIDIA GPUs. When I started using Arnold for architectural projects, I was blown away by the level of detail it could achieve. NVLink only enhances this experience, making your renders look even more lifelike.
Checking Compatibility and Requirements
By now, you might be itching to get started with NVLink and one of these fantastic software options. But hold on, there are a few things you should check first.

https://www.nvidia.com/en-us/geforce/
Hardware Compatibility
To use NVLink, you'll need compatible NVIDIA GPUs. Check the NVIDIA website or your GPU manufacturer's documentation to see if your GPUs support NVLink. I remember the excitement of unboxing my new GPUs and reading through the specs to ensure they were NVLink-ready.
Software Requirements
Each software package has its own GPU requirements and settings. Be sure to check the official documentation for the software you plan to use. It's essential to configure your software correctly to take full advantage of NVLink's power. It took me a bit of trial and error to fine-tune the settings to get the best results.
Future Developments
Technology never stands still, and NVLink is no exception. While NVLink has already proven to be a game-changer, keep an eye on future developments. NVIDIA and software developers are continually working to optimize performance and compatibility. Who knows what exciting advancements lie ahead?
Conclusion
In the world of architectural visualization, the right 3D rendering software can make all the difference. When you combine that with the power of NVLink, you're in for a rendering experience like never before. Whether you choose Maya, Blender, Cinema 4D, V-Ray, Redshift, Octane Render, Arnold, or another option, the key is to match it with the right NVIDIA GPUs and enable NVLink to unlock the full potential.
So, my fellow 3D artists, it's time to dive in, experiment, and create stunning architectural renders that leave clients and peers in awe. With NVLink at your side, your imagination is the only limit. Happy rendering!

3D Studio or Freelance for Real Estate 3D Renders: Making the Right Choice
Unlock the secrets to jaw-dropping real estate 3D renders! Discover whether to hire a pro studio or a freelance genius. Make your project pop with the perfect choice.

Hey there, fellow real estate enthusiast! If you're reading this, chances are you're embarking on a real estate project that needs some eye-catching 3D visualization. You're in the right place because I've been in the industry for quite some time, specializing in creating 3D architectural visualization renders. I've navigated the winding road of choosing between hiring a 3D studio or a freelance 3D renderer for various projects, and today, I'm here to share my insights with you.
The Advantages of Hiring a 3D Studio
Expertise and Specialization
When it comes to 3D rendering studios, one of the major advantages is their pool of specialized talent. These studios typically house a team of skilled professionals with diverse skill sets. I've found that this diversity can be a game-changer for complex projects.
Personal Anecdote: A while back, I was working on a project that involved rendering a massive commercial complex. The sheer size and intricacies of the design were daunting. Fortunately, the 3D studio I hired had specialists in architecture, landscaping, and interior design. They were able to tackle each aspect with finesse, resulting in a stunning final product.
Scalability
3D studios are also better equipped to handle large-scale projects and tight deadlines. They have the resources and personnel to scale up their operations as needed. This scalability can be a lifesaver when you're working on a project with an aggressive timeline or a significant scope.
Personal Anecdote: Once, I had to deliver renders for a luxury resort within a ridiculously short timeframe. The 3D studio I partnered with had the manpower and the infrastructure to meet the deadline without compromising on quality. It was a relief to know that they could handle the pressure.
Established Workflow
Workflow matters—a lot! 3D studios have a well-established pipeline for creating renders. Their processes are streamlined, and they often have strict quality control measures in place. This ensures consistency and reliability in the final output.
Personal Anecdote: In the early days of my career, I experimented with hiring freelance renderers for a project. While they were talented, the lack of a structured workflow led to delays and inconsistencies in the project. It taught me the value of a studio's organized approach.
Access to Resources
Another big plus with 3D studios is their access to cutting-edge software, hardware, and extensive libraries of assets. They keep up with the latest tools and technologies, which can greatly enhance the quality of your renders.
Personal Anecdote: I once had a project that required highly detailed and realistic vegetation in the renders. The studio I hired had an extensive plant library, complete with photorealistic models. It saved me a ton of time and effort compared to creating those assets from scratch.

The Benefits of Hiring a Freelance 3D Renderer
Cost-Effectiveness
Now, let's talk about the freelance route. Freelance 3D renderers are often more cost-effective, mainly because they have lower hourly rates compared to 3D studios. This can be a significant advantage, especially if you're working on a tight budget.
Personal Anecdote: In the early stages of my career, I frequently took the freelance route to save on costs. It allowed me to allocate more resources to other aspects of my projects, such as marketing and client engagement.
Personalized Attention
One of the standout benefits of hiring a freelance renderer is the one-on-one collaboration you get. Communication is direct, and feedback is often implemented swiftly. This personal touch can be invaluable when you have a specific vision in mind.
Personal Anecdote: On a residential project, I hired a freelance renderer who was exceptional at capturing the essence of the design exactly as I envisioned it. The direct line of communication made it easy to fine-tune details, resulting in a satisfied client and a successful project.
Flexibility
Freelance renderers often offer flexibility in terms of schedules and project customization. They can adapt to your unique requirements and are more likely to accommodate changes on the fly.
Personal Anecdote: Once, I had a project where the client wanted multiple revisions to the interior design, even after the initial render was complete. The freelance renderer I hired was incredibly accommodating, and we were able to make those changes quickly, keeping the client happy.
Unique Style
Freelance 3D renderers come in all shapes and styles. They bring their unique artistic touch to projects, which can result in renders that stand out from the crowd. If you're looking for something unconventional or artistic, freelancers can be the way to go.
Personal Anecdote: I once worked with a freelance renderer who had a knack for creating stylized, almost dreamlike renders. It added a unique dimension to the project and left a lasting impression on both me and the client.

Factors to Consider When Making Your Choice
Project Size and Complexity
The size and complexity of your project should be a major determining factor. For large-scale, multifaceted projects, a 3D studio's expertise and scalability can be invaluable. On the other hand, simpler projects with a smaller budget might benefit from the cost-effectiveness of a freelance renderer.
Budget Constraints
Let's talk money. Your budget plays a pivotal role in this decision. Be realistic about what you can afford and allocate your resources effectively. Remember, quality should never be sacrificed for cost savings.
Project Timeline
Deadlines can be a deal-breaker. If your project has a tight timeline, consider a 3D studio that can handle the pressure. However, if your schedule allows for more flexibility, a freelance renderer might be a great fit.
Personal Anecdote: I once underestimated the time it would take to complete a project, and I had to scramble to find a freelancer who could step in and help meet the deadline. It was a stressful experience that taught me the importance of timeline considerations.
Communication Preferences
Do you prefer direct communication or are you comfortable with mediated interactions? Think about your communication style and how you like to collaborate. Freelancers offer direct communication, while studios may have a more structured process.
Case Studies: Real-Life Scenarios

Scenario 1: A Large Real Estate Development Project
Imagine you're in charge of rendering a massive real estate development. Multiple buildings, intricate landscaping, and a tight deadline are in the mix. In this scenario, a 3D studio's expertise and scalability would shine.
Scenario 2: A Small-Scale Residential Property
On the flip side, picture a small residential property project with a limited budget. A freelance renderer's cost-effectiveness and personalized attention could be the perfect fit.
Scenario 3: A Unique and Artistic Architectural Concept
Now, envision a project with a bold, artistic vision. You want renders that stand out and make a statement. A freelance renderer's unique style and flexibility can help bring your creative vision to life.
Making Your Decision
To make the right choice, evaluate your project requirements carefully. Consider the size, complexity, budget, timeline, and your communication preferences. Conduct a cost-benefit analysis, review portfolios, and check references.
Personal Anecdote: I've learned the hard way that making a decision without thoroughly researching and evaluating your options can lead to unexpected hiccups down the road. Take your time with this step—it's crucial.
Conclusion
In the end, whether you choose a 3D studio or a freelance 3D renderer, it all comes down to what aligns best with your project's needs and your personal preferences. Each has its own set of advantages, and there's no one-size-fits-all answer.
I hope this article has shed some light on the factors to consider when making this decision. Remember, the success of your real estate project often hinges on the quality and impact of your 3D renders, so choose wisely, my friend!

Did this blog help you? We have a free e book for developers available on our site just one click away!

Different Types of House Renderings: A Comprehensive Guide
Explore the world of house renderings with an experienced 3D artist. Discover photorealistic exteriors, immersive VR experiences, and expert tips for aspiring artists in this comprehensive guide.

Hey there, fellow architecture enthusiasts and aspiring 3D artists! If you're like me, you've probably marveled at those stunning images and animations of houses that seem so lifelike you could almost reach out and touch them. Well, you're in luck because I'm here to take you on a journey through the fascinating world of house renderings. As a seasoned 3D artist specializing in architectural renderings, I've had my fair share of experiences, and I'm excited to share my insights with you.
Photorealistic Exterior Renderings: Bringing Dreams to Life
Let's start with the heavy hitters – photorealistic exterior renderings. These are the true showstoppers. When I first started in this field, I was amazed by how a well-crafted exterior rendering could transform a blueprint into a breathtaking visual masterpiece.
Tools of the Trade: Achieving photorealism requires top-notch software like Blender, 3ds Max, or SketchUp. For instance, I once had a project where the client wanted a rendering that looked like it had been plucked straight out of a magazine. It took meticulous attention to detail and a lot of coffee, but the end result was worth it.

Interior Renderings: From Basic to Hyper-realistic
Now, let's step inside. Interior renderings are where you get to play with lighting, textures, and furniture placement to create spaces that feel as real as the world outside.
The Basic Approach: In the early days, I often started with basic interior renderings. They're quick and straightforward, ideal for presenting initial concepts to clients. It's like sketching your ideas on paper before turning them into a masterpiece.
Going Hyper-realistic: As my skills grew, I ventured into hyper-realistic interior renderings. These are a whole new level of detail. I remember a project where the client wanted to sell a luxury penthouse, and every thread on the plush couch had to be perfect. It was challenging, but it was also a labor of love.

Aerial and Bird's Eye View Renderings: Seeing the Bigger Picture
Sometimes, you need to step back and see the bigger picture. Aerial and bird's eye view renderings offer a unique perspective that's invaluable for showcasing a property's surroundings.
Taking to the Skies: Aerial views are fantastic for highlighting the property's relation to its environment. I once worked on a project where we had to showcase a house nestled in the mountains. The aerial view not only showcased the house but also the breathtaking landscape that came with it.
Conceptual Sketches and Hand-Drawn Renderings: The Artistic Touch
Now, let's dive into the artistic side of architectural visualization. Conceptual sketches and hand-drawn renderings are like the soul of a project. They convey the initial spark of an idea.
Sketching it Out: I remember a time when I was working on a project for a historic restoration. The client wanted to capture the essence of the building's past, so we started with rough sketches. It was amazing to see those initial ideas evolve into a beautifully detailed rendering.
Virtual Reality (VR) and 360-Degree Renderings: Immersing Your Audience
Fasten your seatbelts; it's time to immerse yourself in the future. Virtual reality (VR) and 360-degree renderings are changing the game.
Step into the Virtual World: With VR, you can walk through a property before it's even built. It's like teleporting into the future. I once had a client who wanted potential buyers to explore a luxury apartment complex from the comfort of their own homes. VR made that dream a reality.
Animation and Walkthroughs: Storytelling in Motion
When static images aren't enough to tell the story, animation and walkthroughs come to the rescue.
Bringing it to Life: Animations breathe life into your projects. I remember a project where we had to showcase how a commercial space transformed throughout the day, from a bustling coffee shop in the morning to a vibrant nightclub at night. The animation captured the entire journey.
Hybrid Renderings: The Best of Both Worlds
In today's world, you don't have to choose just one rendering style. Hybrid renderings combine different styles to create something unique.
Mix and Match: Recently, I worked on a project where we blended photorealistic exteriors with a hand-drawn interior. The contrast was stunning and added a touch of artistry to an otherwise conventional rendering.
Choosing the Right Rendering Style: The Art of Decision-Making
So, how do you know which rendering style is right for your project? It all boils down to understanding your goals, audience, and budget.
Start with the Basics: If you're just starting, begin with basic renderings. They're budget-friendly and perfect for presenting initial ideas.
Know Your Audience: Think about who you're trying to impress. If it's a potential buyer, go for photorealism. If it's an architect reviewing your design, a conceptual sketch might do the trick.
Tips and Tricks for Aspiring 3D Artists
Before we wrap up, let me share some nuggets of wisdom for those of you aspiring to become 3D artists in this thrilling field.
Never Stop Learning: Technology evolves, and so should you. Stay updated with the latest software and techniques.
Attention to Detail: It's all about the details. Spend time perfecting the little things; they make all the difference.
Practice, Practice, Practice: Rome wasn't built in a day, and neither are exceptional renderings. Keep honing your skills through practice.
Conclusion: The Magic of House Renderings
In the world of architectural visualization, house renderings are the magic that turns visions into reality. Whether you're creating photorealistic exteriors, diving into interior spaces, or exploring the limitless possibilities of VR, each rendering style has its own unique charm.
As you embark on your journey in this exciting field, remember that the sky's the limit. Don't be afraid to experiment, blend styles, and push the boundaries of your creativity. After all, it's the passion and dedication you put into your work that will truly make your house renderings shine.
So, go ahead, pick your style, and let your imagination run wild. The world of architectural rendering is waiting for your unique touch. Happy rendering!

Did this blog help you? We have a free e book for developers available on our site just one click away!

3D Rendering for Real Estate Marketing: Transforming Properties into Sales
Discover how 3D rendering revolutionizes real estate marketing by creating immersive property previews, enhancing presentations, and boosting buyer confidence. Elevate your real estate business with stunning visuals today!
Hey there, fellow real estate enthusiasts! If you're reading this, you're probably eager to discover how 3D rendering can supercharge your real estate marketing efforts and help you close deals faster. Well, you've come to the right place because I've spent years as a 3D rendering artist, specializing in creating stunning visualizations that help clients market their real estate products effectively. In this article, I'll walk you through the exciting world of 3D rendering and how it can benefit your real estate business.

Understanding 3D Rendering in Real Estate
What is 3D Rendering?
Let's start with the basics. 3D rendering is the process of transforming a 3D model or scene into a 2D image or animation. It's like taking a blueprint of your property and turning it into a jaw-dropping, photorealistic image or virtual tour that potential buyers can explore from the comfort of their own homes.

The Process of Creating 3D Renders
Creating a 3D render is a meticulous process. It begins with the creation of a 3D model of the property, including all its architectural and design details. Then, lighting, textures, and materials are added to make the scene look as lifelike as possible. Finally, the rendering software works its magic to produce stunning visuals that showcase your property in the best possible light.
Now, let me share a personal anecdote. I once had a client who was struggling to sell a luxury penthouse apartment. After creating a 3D render that highlighted the breathtaking views, luxurious interior, and exquisite details, the property practically sold itself. The prospective buyers were captivated by the visuals, and the property went off the market within weeks.

Why Real Estate Professionals Are Turning to 3D Rendering
So, why are real estate professionals increasingly adopting 3D rendering? Well, here are a few compelling reasons:
1. Immersive Property Previews
When potential buyers can see every nook and cranny of a property before visiting it in person, it builds confidence in their decision-making process.
2. Enhanced Property Presentations
3D rendering enables you to provide virtual tours and interactive floor plans, offering a level of engagement that static images simply can't match.
3. Personalized Customization
With 3D rendering, you can tailor your renders to match the preferences of your target demographics. It's like offering a bespoke experience for each potential buyer.

Benefits of 3D Rendering in Real Estate Marketing
Immersive Property Previews
Creating Lifelike Interiors
One of the most significant advantages of 3D rendering is its ability to showcase the interior of a property with astonishing realism.
Imagine this: A client of mine had a property with an unusual layout. Buyers were struggling to visualize how they could use the space effectively. Using 3D rendering, I transformed the confusing layout into a functional, stylish living space. Buyers could see themselves living there, and the property sold swiftly.
Showcasing Exterior Aesthetics
Exterior visuals matter just as much as interiors. With 3D rendering, you can capture the beauty of your property's surroundings, whether it's a charming suburban neighborhood or a sleek urban skyline.
Enhanced Property Presentations
Virtual Tours
I've found that virtual tours are a game-changer in the world of real estate marketing. They allow potential buyers to "walk through" the property at their own pace, creating a deeper connection.
Interactive Floor Plans
Interactive floor plans let buyers rearrange furniture virtually and get a sense of how they can personalize the space. It's like a virtual home improvement show that helps them envision the possibilities.
Personalized Customization
Tailoring your 3D renders to your target audience can make a world of difference. Here's a personal story to illustrate:
I once worked on a project where the target buyers were families looking for spacious, kid-friendly homes. I added 3D-rendered children's bedrooms, play areas, and family-friendly layouts to the property visuals. The response was phenomenal, and the property attracted multiple interested families in no time.
Cost and Time Efficiency
Reducing the Need for Physical Staging
Traditional staging can be costly and time-consuming. 3D rendering allows you to create multiple staging scenarios at a fraction of the cost and with lightning speed.
Streamlining the Approval Process
When you're dealing with multiple stakeholders, like investors, architects, and developers, 3D renders can simplify the approval process.
I recall a project where the developer and the interior designer had conflicting visions for a luxury condo. By creating 3D renders of both concepts, we resolved the disagreement swiftly, ensuring the project stayed on track.

Faster Sales Cycles and ROI
In the fast-paced world of real estate, time is money. 3D rendering accelerates the sales cycle by giving buyers a comprehensive view of the property upfront.
I once worked with a real estate agent who struggled to sell properties in a new development. After we incorporated 3D renders into their marketing strategy, the properties sold 30% faster, resulting in a substantial increase in ROI.
The Impact on Buyer Decision-Making
Boosting Confidence in Property Choices
When buyers can see exactly what they're getting, it reduces their anxiety about making such a significant investment.
Think of it this way: Would you buy a car without seeing it or test driving it first? The same principle applies to real estate. 3D rendering provides that test drive experience for properties.
Reducing Buyer's Remorse
Buyer's remorse can be a real issue in real estate. However, when buyers have explored a property in detail through 3D renders, they're more likely to feel confident about their purchase.
Increasing Sales Conversion Rates
Ultimately, 3D rendering can significantly increase your sales conversion rates. When potential buyers are already emotionally invested in a property through stunning visuals, they're more likely to take the plunge and make an offer.
Data and Resource Requirements
Creating high-quality 3D renders requires powerful computers and specialized software. It's essential to invest in the right tools to ensure the best results.

Maintaining Accuracy and Realism
To be truly effective, 3D renders must be as accurate and realistic as possible. This means paying attention to every detail, from the texture of the flooring to the play of light and shadow.
The Need for Skilled 3D Rendering Professionals
Not just anyone can create compelling 3D renders. It takes a combination of technical expertise and artistic flair. When choosing a 3D rendering partner, be sure to review their portfolio and check for testimonials.

Incorporating 3D Rendering into Your Real Estate Marketing Strategy
Finding a Skilled 3D Rendering Partner
When seeking a 3D rendering partner, consider their experience, the quality of their work, and their ability to understand your vision. Personal recommendations and online reviews can be invaluable in your search.
Budgeting and Resource Allocation
While 3D rendering can be cost-effective compared to traditional staging, it's still an investment. Allocate a portion of your marketing budget for 3D rendering services, and you'll reap the rewards.
Integrating 3D Renders Across Marketing Channels
Don't limit the use of your 3D renders to a single platform. Incorporate them into your website, social media, and even printed marketing materials. The more exposure your visuals get, the more impact they'll have.
Future Trends in 3D Rendering for Real Estate
Advancements in Augmented and Virtual Reality
As technology evolves, augmented reality (AR) and virtual reality (VR) are becoming more accessible and affordable. These technologies will soon allow potential buyers to experience properties in entirely immersive ways.
AI-Driven Personalization
AI is becoming increasingly sophisticated in analyzing buyer preferences. In the future, AI-driven 3D renders may automatically adapt to each viewer's preferences, enhancing the personalization of property previews.
Sustainable Design Visualization
With the growing focus on sustainability, 3D rendering will play a crucial role in showcasing eco-friendly features, such as solar panels and energy-efficient designs, in an appealing way.

Conclusion
In conclusion, 3D rendering is a game-changer in the world of real estate marketing. It provides immersive property previews, enhances property presentations, and offers personalized customization that can help you stand out in a competitive market. By reducing costs and time, boosting buyer confidence, and increasing conversion rates, 3D rendering is a must-have tool for modern real estate professionals.
So, if you're ready to take your real estate marketing to the next level, don't hesitate to explore the world of 3D rendering. Embrace the future of real estate sales, and start reaping the benefits today. Your clients and your bottom line will thank you for it. Happy selling!
Did this blog help you? We have a free e book for developers available on our site just one click away!

VRAY, LUMION, ENSCAPE | Top 3 Best Rendering Software and Plugins for SketchUp
Discover the top 5 rendering software and plugins for SketchUp! Elevate your designs with realism, real-time magic, and ease. Uncover the perfect tool for your projects in this expert guide.

Hey there, fellow SketchUp enthusiasts! If you're like me, you know that SketchUp is an incredible tool for creating 3D designs and models. But sometimes, we need a little extra oomph to take our creations to the next level. That's where rendering software and plugins come in handy. They can turn your 3D models into stunning, lifelike visuals that will leave your clients or viewers in awe.
In this article, I'll share my personal insights and experiences as a long-time SketchUp user, and we'll explore the top 5 rendering software and plugins that can supercharge your SketchUp projects. Whether you're a seasoned pro or just getting started, there's something here for everyone.
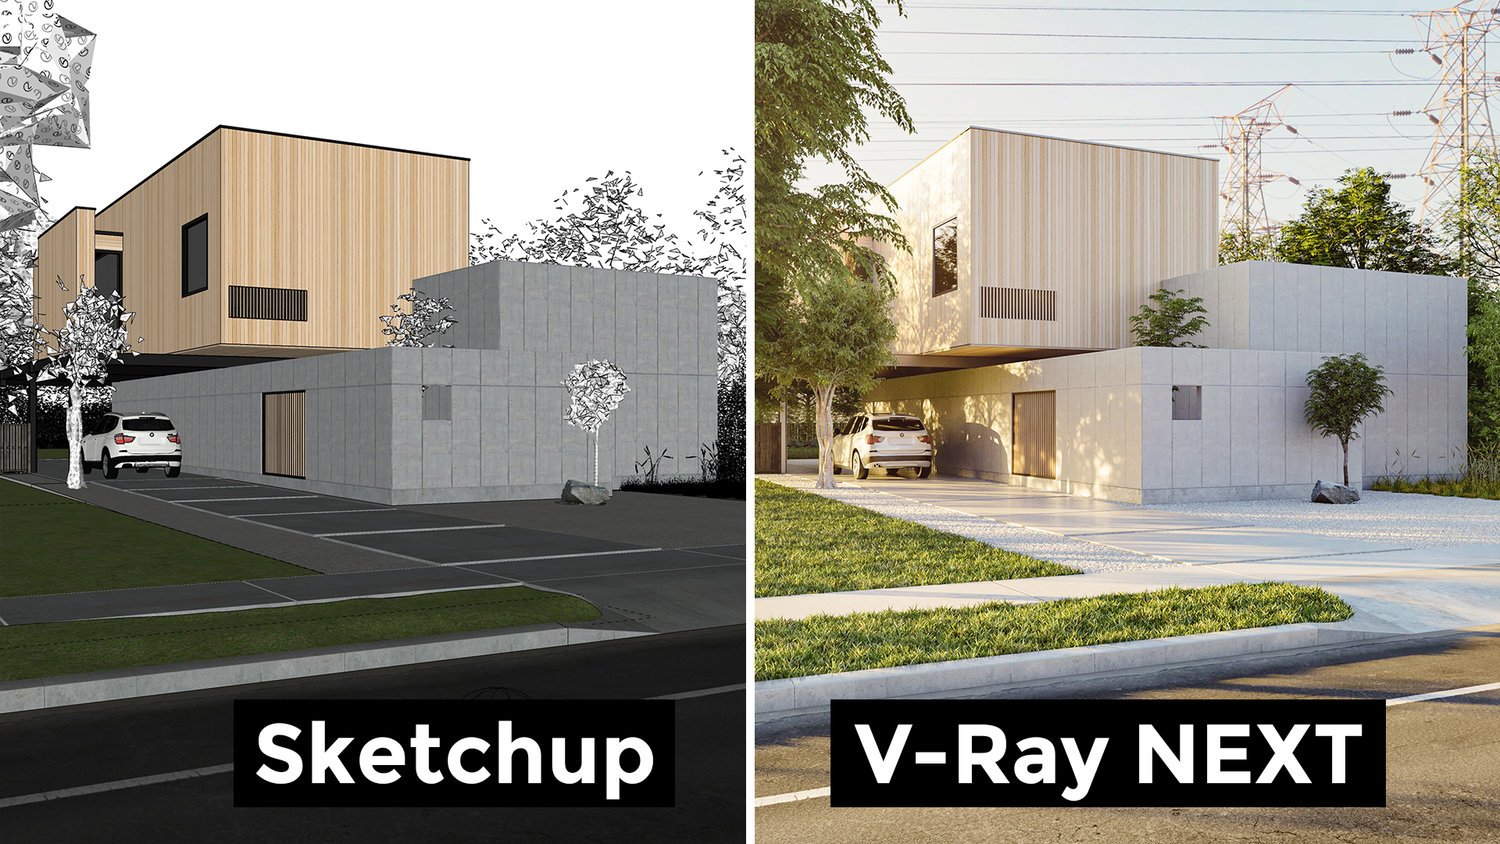
https://www.archinspirations.com/blog/modern-house-exterior-rendering-vray-for-sketchup
1. V-Ray for SketchUp
Overview of V-Ray
V-Ray is a name that resonates with most 3D artists. It's like the Rolls-Royce of rendering engines, and for a good reason. When I first tried V-Ray for SketchUp, I was blown away by the level of realism it brought to my designs. The lighting and shading it produces are incredibly lifelike.
Key Features
Realistic Lighting and Shading: V-Ray's ray-tracing capabilities create stunning, true-to-life lighting and shadows. It's perfect for architectural visualization and product design.
Interactive Rendering: The interactive rendering feature lets you see changes in real-time, making the creative process much smoother.
Extensive Material Library: V-Ray comes with a vast library of pre-built materials that can save you a ton of time.
How to Use V-Ray with SketchUp
Using V-Ray with SketchUp is relatively straightforward, thanks to its user-friendly interface. Just make sure your model is complete, apply materials, set up lights, and start rendering. You can fine-tune the settings to achieve the exact look you want.
Pros and Cons of V-Ray
Pros:
Unparalleled realism
Interactive rendering for quick feedback
Robust material library
Cons:
Can be resource-intensive
Pricing might not be suitable for beginners

https://download.archsupply.com/get/download-lumion-livesync-sketchup/
2. Lumion
Introduction to Lumion
Lumion is all about real-time rendering. Imagine making changes to your SketchUp model and seeing them instantly reflected in your render. It's a game-changer!
Key Features
Real-Time Rendering: Lumion's strength lies in its ability to render in real-time, making it perfect for presentations or client meetings.
High-Quality Materials and Environments: The software comes with a vast library of high-quality materials and environments, so you can quickly create a variety of scenes.
Seamless Integration with SketchUp: Lumion integrates seamlessly with SketchUp, making the transition from model to render a breeze.
How to Use Lumion with SketchUp
Using Lumion is a breeze. Import your SketchUp model, set up the scene, apply materials, and hit the render button. The real-time rendering means you can tweak your design on the fly, which is incredibly handy.
Pros and Cons of Lumion
Pros:
Real-time rendering for instant feedback
A wide range of high-quality materials and environments
Easy integration with SketchUp
Cons:
Requires a powerful computer for optimal performance
The learning curve can be a bit steep for beginners
https://blog.enscape3d.com/enscape-for-sketchup-2022
3. Enscape
Enscape's Role in SketchUp Rendering
Enscape is known for its ability to provide real-time 3D walkthroughs of your SketchUp models. It's like taking your clients on a virtual tour of your design.
Key Features
Real-Time 3D Walkthroughs: Enscape allows you to create immersive, real-time 3D walkthroughs, which is fantastic for architectural presentations.
Intuitive User Interface: Enscape's user-friendly interface means you can start rendering without spending hours learning the software.
VR Support: If you have a virtual reality headset, Enscape lets you explore your design in VR, which is a mind-blowing experience.
How to Use Enscape with SketchUp
Enscape's integration with SketchUp is seamless. After installing the plugin, simply click the "Start" button, and you'll be transported into your SketchUp model in real-time.
Pros and Cons of Enscape
Pros:
Real-time 3D walkthroughs for immersive presentations
User-friendly interface
VR support for an immersive experience
Cons:
Limited in terms of advanced rendering settings
The free trial is quite short
Conclusion
In the world of SketchUp rendering, these five options offer a range of choices to cater to your specific needs and preferences. Whether you prioritize realism, real-time feedback, or simplicity, there's a rendering software or plugin for you.
Remember, the best rendering tool for you ultimately depends on your project requirements and your familiarity with rendering software. So, go ahead and explore these options, experiment with them, and discover the one that suits your style and workflow best.
Rendering can truly take your SketchUp creations to the next level, making them more engaging and impressive. So, dive in, enhance your designs, and don't forget to share your experiences and questions with the SketchUp community. We're all here to help you make the most of this fantastic 3D modeling and rendering journey.
Happy rendering, SketchUp enthusiasts!

The Significance of Architectural Renderings in Architecture
Discover the pivotal role of architectural renderings in modern architecture. From enhancing design clarity to aiding decision-making, see how these digital tools revolutionize communication and marketing in the world of architecture.

Introduction
When it comes to bringing architectural dreams to life, we architects rely on a powerful tool in our arsenal: architectural renderings. These digital representations of our designs play a pivotal role in modern architecture, and in this article, we'll explore why. Think of architectural renderings as the artist's canvas, a virtual sketchpad that not only enhances design clarity but also aids in critical decision-making processes, improves communication with clients, and even helps us market our projects effectively.

Enhancing Design Clarity
In the early stages of an architectural project, it can be challenging to convey complex design concepts to clients, contractors, or even team members. This is where architectural renderings shine. These visualizations provide a crystal-clear snapshot of what the final product will look like. It's like having a sneak peek into the future of your creation.
I remember a project where the client had difficulty visualizing how a multi-story building would fit seamlessly into its natural surroundings. By using architectural renderings, we were able to provide them with a stunning 3D representation of the building nestled among the trees and landscape. The impact was immediate – the client could see our vision, and we were able to proceed with their full confidence.
Aiding in Decision-Making
Architectural renderings aren't just pretty pictures; they are powerful decision-making tools. Imagine this: you're deep into the design phase, and you're faced with a choice between two different façade materials for a commercial building. How do you decide? Architectural renderings allow you to visualize both options in a real-world context.
In a recent project, we were debating whether to go with a sleek, modern design or a more traditional aesthetic for a new office complex. By creating renderings of both options, we could assess how each design would impact the building's overall feel and, more importantly, how it aligned with the client's vision. The decision-making process became significantly more informed and, dare I say, exciting.
Design Communication Between Architects and Clients
One of the most significant challenges architects face is bridging the gap between our technical language and our clients' understanding. We often find ourselves immersed in architectural jargon, which can alienate our clients and make them feel disconnected from the creative process.
Here's where architectural renderings become our allies in communication. They serve as a universal language, transcending the intricacies of architectural terminology. These visuals make it easier for clients to grasp the essence of our designs. I recall a project where we were working on a modern residential home with an unconventional layout. Instead of relying solely on blueprints and verbal explanations, we used 3D renderings to walk the client through the space. Their eyes lit up as they "walked" through their future home, and they felt like active participants in the design process.

Marketing and Presentation
Architectural renderings are not just tools for architects and clients; they're also potent marketing assets. In today's competitive market, architects need to present their projects in the most compelling way possible. This is where high-quality renderings come into play.
In a recent endeavor, we were tasked with designing a cutting-edge cultural center. To secure funding and attract potential donors, we needed to showcase our vision in a way that would resonate with the public. By creating a series of stunning renderings that captured the essence of the cultural center, we were able to generate significant interest and secure the funding needed to turn our design into a reality.
Conclusion
In the world of modern architecture, architectural renderings are invaluable companions. They enhance design clarity, facilitate decision-making, improve communication with clients, and boost marketing efforts. As architects, we've witnessed the transformative power of these digital visualizations firsthand.
So, whether you're an architect searching for ways to breathe life into your designs or a client eager to understand your architect's vision, keep in mind that architectural renderings are your window into the future of your project. Embrace them, leverage their potential, and watch your architectural dreams come to life with greater clarity and precision than ever before.
Did this blog help you? We have a free e book for developers available on our site just one click away!

IKEA Home Planner, Homestyler | Top 9 3D Interior Design Apps to Visualize!
Discover the magic of 3D interior design apps! Explore 10 outstanding apps, including IKEA Home Planner, Homestyler, and more, to bring your dream room to life. From professional-grade tools to user-friendly interfaces, find the perfect app for your design journey.
Hey there, fellow interior design enthusiast! If you're anything like me, you probably spend countless hours daydreaming about your perfect living space. But envisioning a room's transformation can be challenging, right? That's where 3D interior design apps come to the rescue. These digital tools allow you to visualize your room in stunning 3D, making your interior design dreams come alive.
In this guide, we'll walk you through ten remarkable 3D interior design apps, each with its unique advantages. Whether you're a seasoned designer or just looking to revamp your living room, there's an app here for you. Let's dive in!

ikea.com
1. IKEA Home Planner: Your IKEA Dream Come True
User-Friendly and IKEA-Centric
Let's start with an app that speaks directly to the IKEA aficionados out there. The IKEA Home Planner is a user-friendly gem, perfect for planning your IKEA furniture-filled space. It's like having your very own virtual IKEA store!
Personal Anecdote: When I moved into my first apartment, I went all out with IKEA furniture. Using the IKEA Home Planner, I visualized every nook and cranny of my new space. It saved me from countless returns and made assembly a breeze.
Extensive IKEA Library
What sets this app apart is its extensive library of IKEA products. You can browse through IKEA's furniture and decor items, drag and drop them into your virtual room, and see how everything fits together. It's like a personalized IKEA catalog tailored to your space.
Simplifies 3D Room Design
Even if you're not a tech wizard, the IKEA Home Planner is designed to be intuitive. You can create and modify your room layout in 3D, allowing you to experiment with different arrangements until you find the one that feels just right.

homestyler.com
2. Homestyler: Autodesk's Creative Powerhouse
Professional Tools, User-Friendly Interface
If you're serious about interior design, Homestyler is your go-to app. Developed by Autodesk, the name behind industry-standard design software, it boasts powerful 3D design tools. Yet, it remains incredibly user-friendly, making it accessible to beginners and experts alike.
Realistic Room Planning with AR
One standout feature of Homestyler is its augmented reality (AR) capabilities. You can visualize how furniture and decor items will look and fit in your space in real-time. It's like having a magic wand for room planning!
Personal Anecdote: When I was redesigning my home office, I used Homestyler to try out various desk and shelving arrangements. The AR feature helped me make decisions with confidence, and the end result was just as I had envisioned.
Community and Inspiration
Homestyler also offers a vibrant community of designers and enthusiasts. You can browse through an extensive gallery of designs for inspiration or share your own creations. It's a fantastic platform to connect with like-minded individuals who share your passion for design.

roomsketcher.com
3. RoomSketcher: Floor Plans with Flair
Versatile Floor Plan Creator
Sometimes, the key to a well-designed room lies in the floor plan. RoomSketcher specializes in creating 2D and 3D floor plans with ease. It's perfect for those who want to start their design journey from the ground up.
Rich Furniture and Material Library
RoomSketcher doesn't stop at floor plans. It also offers a library of furniture and materials, allowing you to add the finishing touches to your room designs. Plus, you can see how natural and artificial lighting affects your space.
Personal Anecdote: When I was remodeling my kitchen, I used RoomSketcher to create a detailed floor plan. It helped me plan the placement of appliances, cabinets, and even the island. The result was a kitchen that not only looked great but was also highly functional.
Enhanced Visualization
What's unique about RoomSketcher is its ability to create 3D walkthroughs and 3D snapshots. These features make it easier to visualize the flow of your space, ensuring that your design choices are not only aesthetically pleasing but also practical.
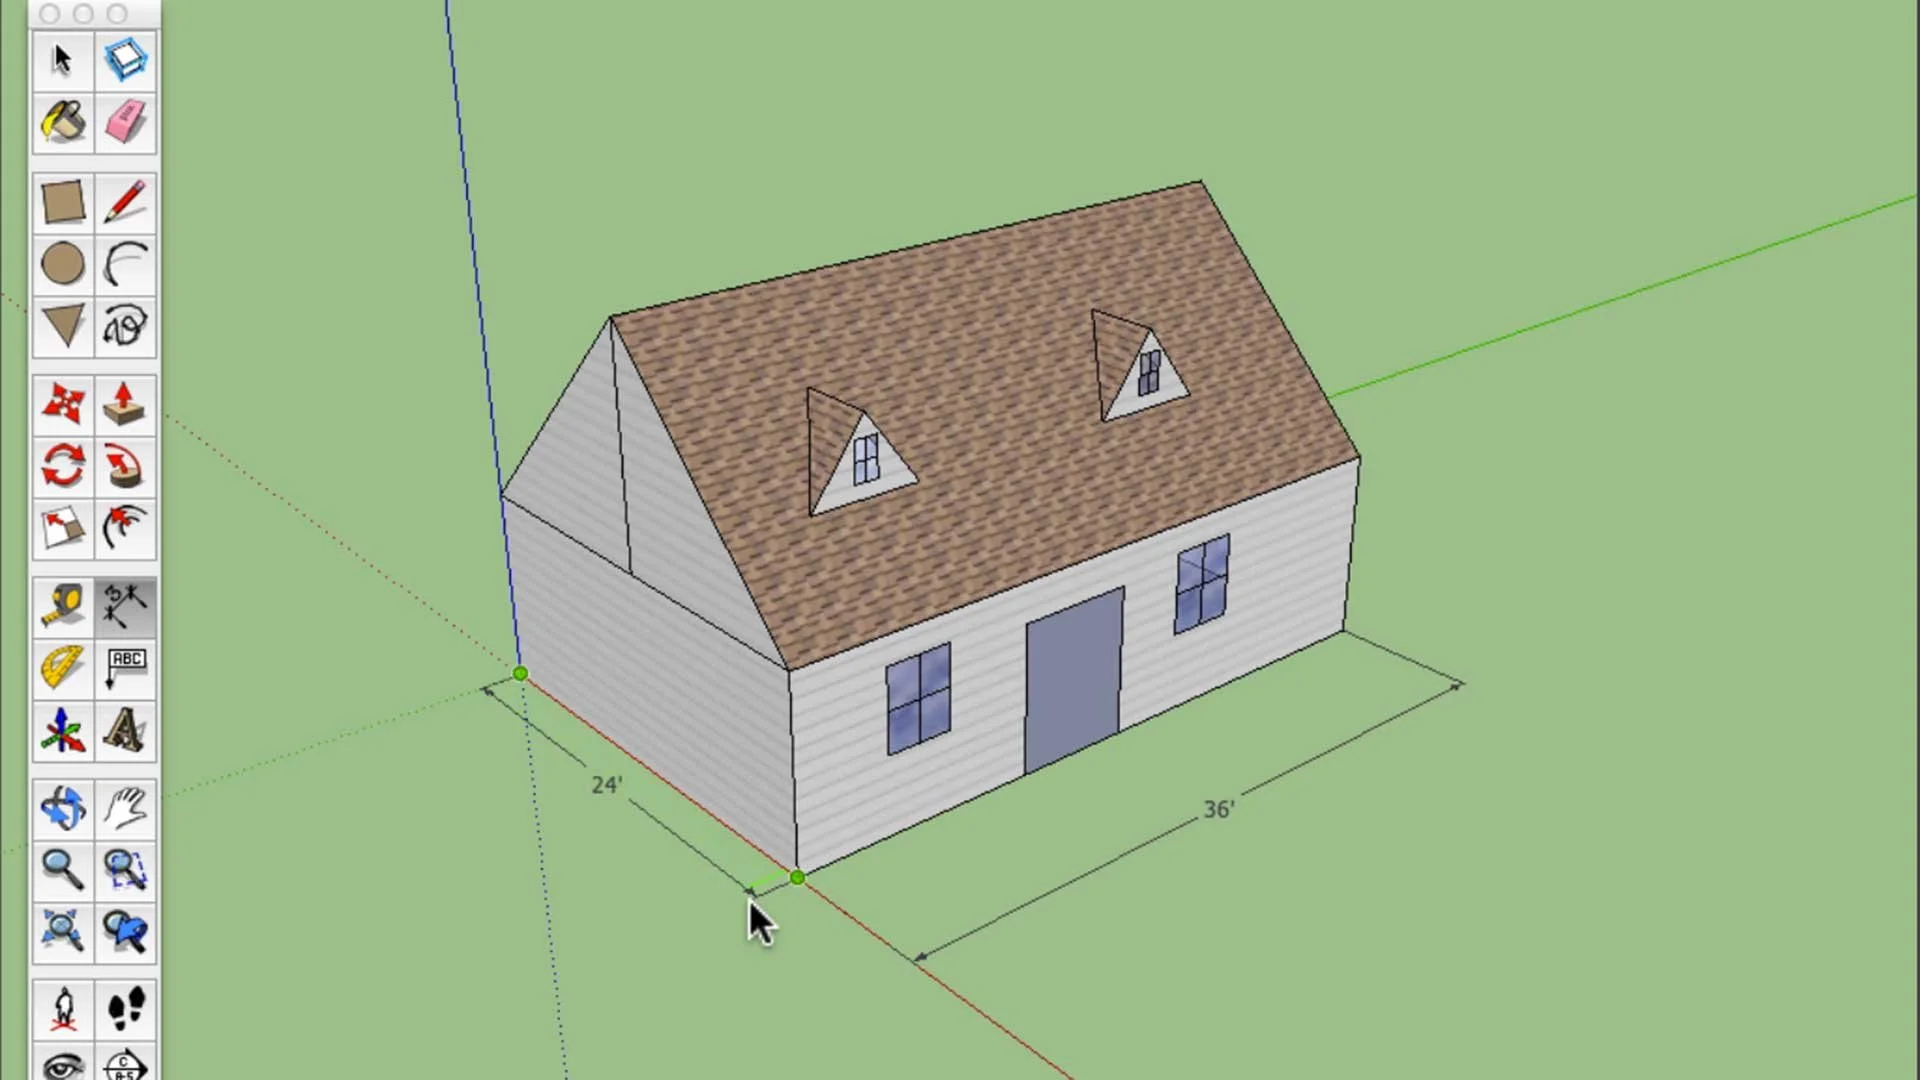
sketchup.com
4. SketchUp: Precision and Realism
Professional-Grade 3D Modeling
If you're ready to take your interior design skills to the next level, SketchUp is your best friend. It's a professional-grade 3D modeling tool that's perfect for those who crave precision and realism in their designs.
Versatility for Advanced Users
While SketchUp may have a steeper learning curve compared to some other apps, it offers unparalleled flexibility. Designers and architects worldwide rely on SketchUp for intricate projects. With SketchUp, your only limitation is your creativity.
Personal Anecdote: When I was working on a home renovation project, SketchUp became my virtual drafting board. It allowed me to create detailed 3D models of the space, helping me plan everything from structural changes to interior decor.

sweethome3d.com
5. Sweet Home 3D: Open-Source and User-Friendly
Open-Source and Free
One of the standout features of Sweet Home 3D is that it's open-source software, which means it's free for anyone to use. This makes it an excellent choice for budget-conscious DIY enthusiasts.
3D Visualization and Virtual Tours
Despite being open-source, Sweet Home 3D doesn't skimp on features. It offers 3D visualization and even allows you to take virtual tours of your designed spaces. It's perfect for anyone looking to create realistic interior designs without breaking the bank.
Personal Anecdote: Sweet Home 3D was my go-to choice when I was helping a friend design their new home. We were able to create a 3D model of the entire house, making it easier to choose colors, furniture, and layouts that suited their taste.
User-Friendly Interface
Sweet Home 3D prides itself on its user-friendly interface. Even if you're not tech-savvy, you'll find it easy to create, edit, and visualize your interior designs in no time.

magicplan.app
6. MagicPlan: Room Planning Made Simple
Smartphone-Friendly Floor Plans
Picture this: You're walking through your home with your smartphone, and with each step, you're creating a detailed floor plan. That's what MagicPlan offers. It turns your smartphone or tablet into a powerful tool for creating floor plans and 3D models.
Convenience and Accessibility
The beauty of MagicPlan lies in its convenience. It's perfect for those spontaneous moments of inspiration when you're not carrying around a tape measure or a laptop. Just whip out your smartphone, and you're ready to start planning.
Personal Anecdote: I had a burst of inspiration while shopping for furniture, and I wasn't prepared with measurements. MagicPlan came to the rescue, and within minutes, I had a detailed floor plan of my living room. It saved me from making a costly mistake.
Versatility for Homeowners and Professionals
Whether you're a homeowner looking to plan your space or a professional in the real estate or interior design industry, MagicPlan is a versatile tool. It offers both free and premium features, so you can choose the level of functionality that suits your needs.
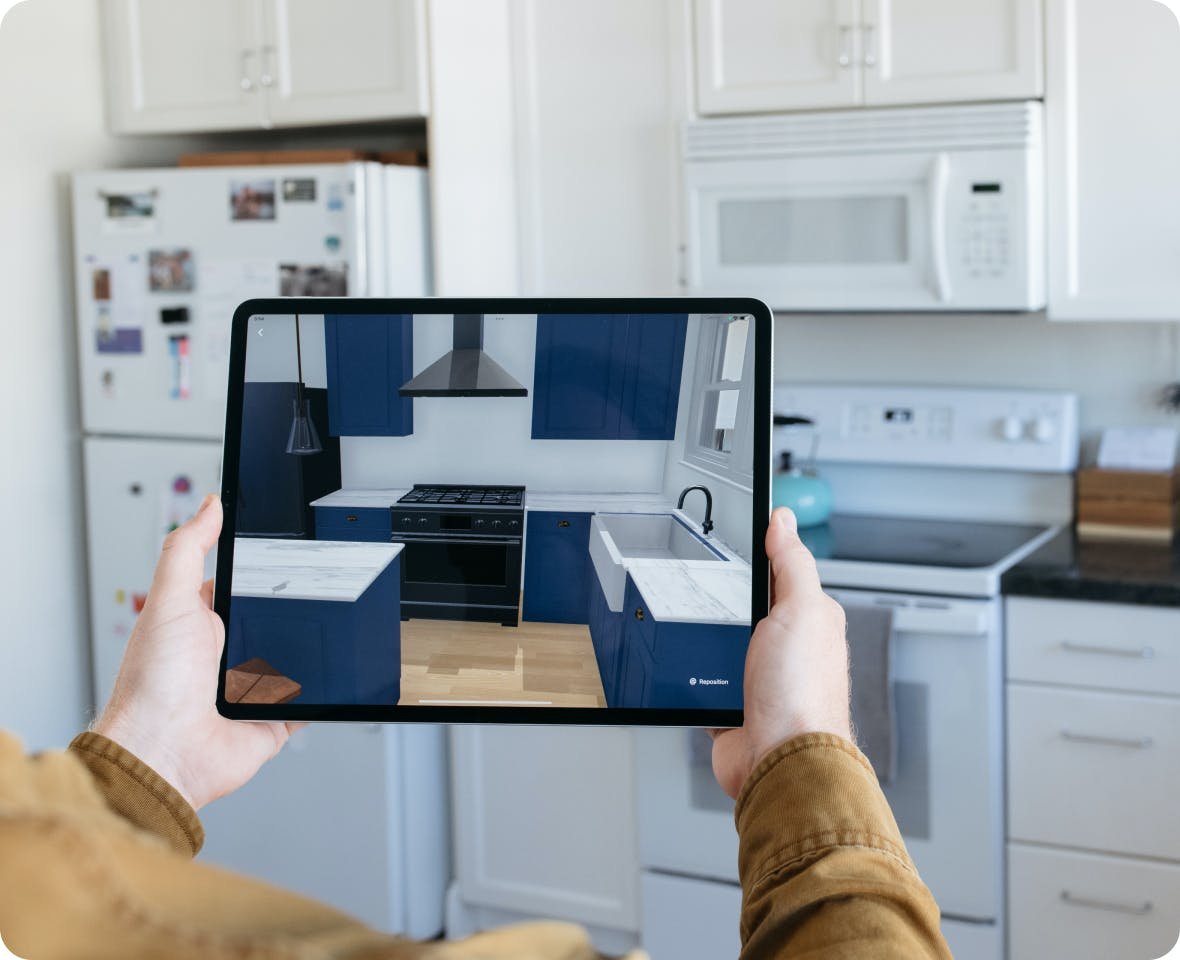
houzz.com
7. Houzz: Design Inspiration with a 3D Twist
Inspiration and 3D Visualization
Houzz is more than just an app; it's a treasure trove of design inspiration. It offers an extensive collection of interior and exterior design photos to spark your creativity. But that's not all—Houzz also features a 3D tool that lets you visualize furniture and decor in your space.
Community and Sharing Features
Houzz boasts a vibrant community of designers, architects, and homeowners. You can connect with professionals, ask for advice, and even hire experts for your projects. It's a one-stop platform for all your design needs.
Personal Anecdote: When I was struggling to choose a color scheme for my bedroom, I turned to Houzz for inspiration. I found a beautiful bedroom design that became the basis for my project. Plus, I was able to connect with the designer and get some valuable tips.
Comprehensive Design Resource
Houzz is not just an app; it's a comprehensive design resource. You can browse through articles, product recommendations, and even find local professionals to help bring your design dreams to life.

en.roomeon.com
8. Roomeon: Real-Time 3D Rendering
Real-Time 3D Rendering
Roomeon takes 3D rendering to a whole new level with its real-time capabilities. You can make changes to your room design, and the app instantly reflects those changes. It's like having your own personal interior design studio.
Experimentation and Creativity
Roomeon encourages experimentation. You can try out various designs and layouts without the fear of making permanent changes. It's the perfect platform for letting your creativity run wild.
Personal Anecdote: When I was planning my home office, I used Roomeon to experiment with different desk arrangements and color schemes. Being able to see the changes in real-time helped me finalize my design with confidence.
Detailed Planning for Perfectionists
For those who are perfectionists when it comes to interior design, Roomeon offers the level of detail you crave. You can adjust everything from the color of the walls to the placement of individual furniture items.

morpholioapps.com
9. Morpholio Board: Mood Boards Meets 3D Modeling
Professional-Grade Tools
Morpholio Board is designed for professionals but is user-friendly enough for anyone to use. It seamlessly combines mood board creation with 3D modeling, providing a comprehensive platform for interior design planning.
Mood Boards for Inspiration
One of the highlights of Morpholio Board is its mood board creation feature. You can gather inspiration, create mood boards, and then seamlessly integrate those ideas into your 3D designs.
Personal Anecdote: When I was working on a restaurant redesign project, Morpholio Board helped me capture the essence of the space by creating mood boards. It made it easier to visualize how the final design would feel.
Collaboration and Sharing
Morpholio Board also encourages collaboration. You can share your designs with clients, colleagues, or friends, making it a fantastic tool for teamwork on design projects.
Magic of 3D Interior Design Apps
Let's take a moment to appreciate the magic of 3D interior design apps. These apps offer several key advantages:
Enhanced Visualization for Room Planning: Whether you're rearranging furniture or planning a full-scale renovation, 3D visualization allows you to see how your ideas will look in reality. No more guessing games!
Ease of Use for Everyone: From beginners to professionals, these apps cater to a wide range of users. They're designed to be intuitive and user-friendly, so you don't need to be a tech guru to create stunning designs.
Access to Extensive Libraries: Most of these apps provide extensive libraries of furniture, decor items, and materials. This means you can experiment with various styles and elements before making any purchases.
Realistic Rendering and Augmented Reality: Many apps offer realistic rendering and augmented reality features. This means you can virtually "try before you buy," ensuring that your design choices are spot on.

Conclusion: Design Your Dream Space
In conclusion, 3D interior design apps are powerful tools that can transform your interior design dreams into reality. Whether you're planning a complete home makeover or simply want to experiment with a new look for your living room, these apps have you covered.
Remember, the key is to explore and find the app that suits your specific needs and design style. Whether it's the IKEA Home Planner for furniture-focused design, Homestyler for professional-grade tools, or any of the other fantastic options, these apps are here to help you unleash your creativity and design your dream space.
So go ahead, download your favorite app, and embark on your interior design journey. Your perfect living space is just a few virtual clicks away!

Now that you have the apps you need to create and visualize your interior designs, you’ll be needing references! We have just the thing that fits your need. You’re one click away from both our portfolio, or a blog of ours “Architectural Digest, Elle Home | Top 10 Interior Design Magazines to Ignite Your Home Decor Inspiration!”

Architectural Digest, Elle Home | Top 10 Interior Design Magazines to Ignite Your Home Decor Inspiration!
Unlock boundless inspiration for your 3D architectural visualization projects with our top 10 interior design magazine picks! Discover expert insights, stunning visuals, and creative tips to elevate your rendering game.

Hey there, fellow 3D architectural visualization enthusiasts! If you're anything like us, you know that staying inspired is a crucial part of our craft. After all, whether we're creating renderings for a modern penthouse, a cozy cottage, or a cutting-edge office space, we want to make sure our work not only impresses but also inspires.
One of the best sources of inspiration? Interior design magazines! These glossy pages are packed with incredible ideas, stunning spaces, and the latest trends in home decor. They're not just for interior designers; they're a goldmine for us in the world of 3D architectural visualization. So, let's dive into the top 10 interior design magazines that will ignite your home decor inspiration and help you elevate your visualization game.
Architectural Digest: Where Luxury Meets Vision
Architectural Digest, often referred to as AD, is like a treasure trove of opulent interiors and aspirational design. I remember flipping through its pages and feeling an immediate surge of creativity. It showcases homes from around the world, offering a glimpse into the lifestyles of the rich and famous.
How it Inspires: AD's high-end interiors can be a perfect source of inspiration when you're working on luxury residential projects. It's not just about visual aesthetics; it's about capturing the essence of opulence.

Elle Decor: A Blend of Contemporary and Classic
Elle Decor strikes a beautiful balance between contemporary and classic design, making it a must-read for anyone in the visualization game. It's where you'll find the latest trends and timeless ideas living harmoniously on the same page.
How it Inspires: Elle Decor's versatility can spark creativity in both residential and commercial projects. It's like having a design chameleon in your toolkit.

House Beautiful: Practical Design Solutions
House Beautiful is like a friendly neighbor who always has fantastic decor advice. It's all about practicality and functionality. As I've learned, good design isn't just about looking pretty; it's about making spaces work better for people.
How it Inspires: When working on projects with a focus on usability and comfort, House Beautiful's insights can be invaluable.

Dwell: The Epitome of Modern and Minimalist
For lovers of modern and minimalist design, Dwell is a mecca. It showcases innovative architecture and interior design ideas that push boundaries and redefine spaces.
How it Inspires: Dwell's clean lines and contemporary concepts can provide a fresh perspective when creating 3D renderings for forward-thinking clients.
Interior Design Magazine: A Peek into the Industry
Now, if you're really serious about your 3D architectural visualization career, Interior Design Magazine is your backstage pass to the industry. It's like the ultimate insider's guide, offering insights into the latest trends and projects.
How it Inspires: As someone who's always striving to stay at the cutting edge of the field, this magazine provides valuable industry-specific knowledge that can give your renderings an extra edge.

Veranda: Embrace Luxury and Elegance
Veranda is all about luxury and elegance. It showcases exquisite interiors and outdoor spaces that feel like they're straight out of a dream.
How it Inspires: When you're working on high-end residential projects, Veranda's pages can help you capture the essence of luxury in your renderings.

Lonny: Accessible Design for Real Homes
For a more accessible approach to interior design, Lonny is your go-to. It features real homes and achievable decor ideas. I love how it makes the world of design feel more relatable.
How it Inspires: Lonny's down-to-earth style can help you create 3D visualizations that resonate with a broader audience.

Belle: A Taste of Sophistication
If you're looking for sophistication and refined design ideas, Belle is an excellent choice. It's an Australian gem that combines local and international design inspiration.
How it Inspires: Belle's unique perspective can infuse your 3D renderings with a touch of international flair.

Livingetc: Contemporary Inspiration for Modern Homes
Livingetc, based in the UK, is your destination for contemporary design inspiration. It caters to those who appreciate sleek and modern aesthetics.
How it Inspires: When working on projects that demand a contemporary vibe, Livingetc can help you nail the details.

Cottages & Bungalows: Cozy and Charming Delights
For lovers of cozy and cottage-style decor, Cottages & Bungalows is a delightful source of inspiration. It showcases charming interiors that exude warmth and character.
How it Inspires: Whether you're designing a quaint cottage or a cozy corner in a larger space, Cottages & Bungalows can guide you in creating inviting 3D renderings.

How to Make the Most of Interior Design Magazines
Now that we've introduced you to these fantastic magazines, let's talk about how to make the most of them. Here are some tips:
1. Stay Curious and Open-Minded
Don't limit yourself to one magazine. Explore them all, even if a particular style isn't your usual cup of tea. You never know what creative sparks may fly when you step out of your comfort zone.
2. Create a Vision Board
Consider creating a digital or physical vision board where you can collect images, color palettes, and design elements that inspire you. This can be a handy reference when you're deep into a visualization project.
3. Adapt Ideas to Your Projects
Remember that the goal is not to replicate what you see in these magazines but to extract ideas and concepts that you can adapt to your 3D architectural visualization projects.
4. Stay Updated
Interior design trends evolve, so stay updated by regularly checking out the latest issues or online content from these magazines. What's in vogue today may be different tomorrow.
